How to Apply Textured Ceiling Compounds: Step-by-Step Guide
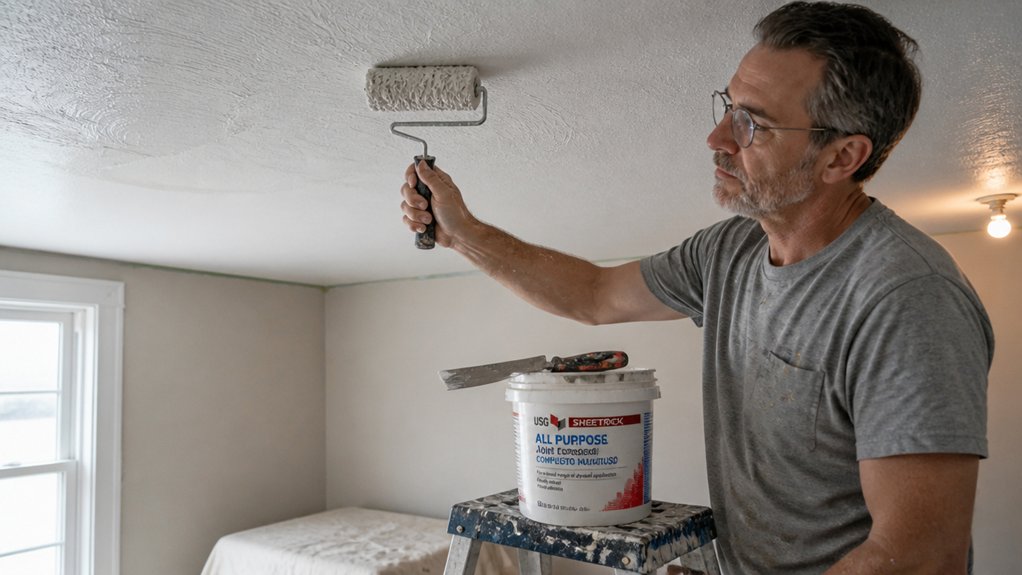
Textured ceiling compounds can absolutely be tackled on a weekend, but surface prep is what separates a smooth finish from a patchy mess.
The texture will decorate minor flaws, not hide them, so you still need to patch cracks, sand with 120-grit, and cover your light fixtures first.
You will mix joint compound at a four to one mud-to-water ratio until it slumps slowly off your knife, then spray at 100 PSI from about 36 inches back.
A 24-inch blade at a 15-degree angle knocks down the peaks, and you will wait a full 24 hours for the cure time before priming or painting.
This guide covers every coat, tool angle, and drying time detail so you can skip the trial and error.
Stick with me through the next sections, and you will get a professional looking ceiling without the pro price tag.
Quick Answer
- Inspect and patch ceiling cracks, stains, or loose tape before texturing.
- Mix joint compound with water at a 4-to-1 ratio to a slow-slumping consistency.
- Spray at 100 PSI with a 3/8-inch nozzle, holding the gun 36 inches away.
- Wait 15 minutes, then flatten peaks with a 24-inch knife at a 15-degree angle.
- Cure 24 hours, then sand with 120-grit; use flat paint to hide texture flaws.
Prep Your Ceiling for Texture
Prep work is the unglamorous, non-negotiable foundation of a good texture job. Start with a thorough ceiling inspection, scanning for cracks, stains, or loose drywall tape.
If you find damage, patch it now, because texture won’t hide flaws; it will only decorate them. Then handle your safety prep: turn off power to ceiling fixtures, cover them with plastic, and tape off trim and walls with painter’s tape.
I always lay down canvas drop cloths on the floor, not plastic, since slipping on plastic while holding a spray gun is a mistake you will only make once. Wear goggles and a dust mask, even if it feels like overkill.
Trust me, your future self and your lungs will thank you. A clean, prepped ceiling is the only thing standing between you and a smooth, uniform finish.
Before you spray, check your texture hopper and compressor for dry spots or clogs, and confirm your primer is fully cured, not just dry to the touch. Drying time and cure time are different, and a ceiling that feels ready can still trap moisture under the texture.
Use a matte or flat sheen for the topcoat later, since gloss or satin will highlight every ridge and lap mark. Sand any patched areas with 120-grit sanding grit to blend them flat, then wipe away dust with a damp rag.
Keep a wet edge when you apply the texture, moving in even passes so the pattern stays consistent. If you stop mid-ceiling, the overlap will show as a hard line, so plan your work from corner to corner.
Low-VOC primers and textures keep the fumes down, which matters in a closed room. After you finish, let the texture dry fully before you prime or paint, and check your drop cloths for stray splatter before you fold them up. Tape-prime new roller covers and remove loose fibers to prevent fuzz from marring a smooth finish on your ceiling.
Mix Joint Compound for Spraying

Mixing your own joint compound for spraying is like making pancake batter. Too thick and it clogs the gun, too thin and it runs everywhere.
Start with a 4-to-1 ratio of mud to water, but adjust from there. Pour in water gradually, then stir with a paddle mixer on a drill until smooth. No lumps, or you’ll curse yourself mid-spray.
Consistency testing is non-negotiable. Scoop some up with a drywall knife and watch it slump slowly, not flow like soup.
For a fine orange peel texture, aim for a just-pourable stiffness. If it’s too runny, add more mud. If it’s too stiff, splash in a little water. Ten minutes of fiddling now beats redoing a ceiling later.
Always mix small batches, because fresh mud sprays better than leftovers. Before you spray, lay down a drop cloth and mask off trim with painter’s tape to avoid a mess.
Use a primer over the repaired area once the compound dries, and pick a satin or matte topcoat for walls to hide any slight texture differences. Remember that drying time is a few hours, but cure time before sanding or painting is often overnight.
For sanding, use 120-grit on a pole sander to smooth high spots, then wipe away dust with a tack cloth. If you see lap marks after spraying, they come from uneven wet edge, so keep your passes overlapping while the compound is still damp.
Keep your spray gun nozzle clean and unclogged, and check the hopper pressure before each batch. The right sheen, like eggshell or low-luster, will help blend the texture, but a high-gloss paint will highlight any imperfection.
Stir each batch thoroughly, and don’t reuse old compound that’s dried on the rim. If you’re spraying a ceiling, work in small sections and keep a wet edge to avoid hard lines.
A bit of patience with the mix saves you from a patchy finish, and the payoff is a smooth, professional result. Finally, clean your tools with water right after spraying, because cured compound is a nightmare to remove from a paddle or gun.
Keep your spray gun nozzle and hopper free of dried residue between batches, just as you would maintain any precision tool.
Spray Ceiling Texture: Settings and Technique
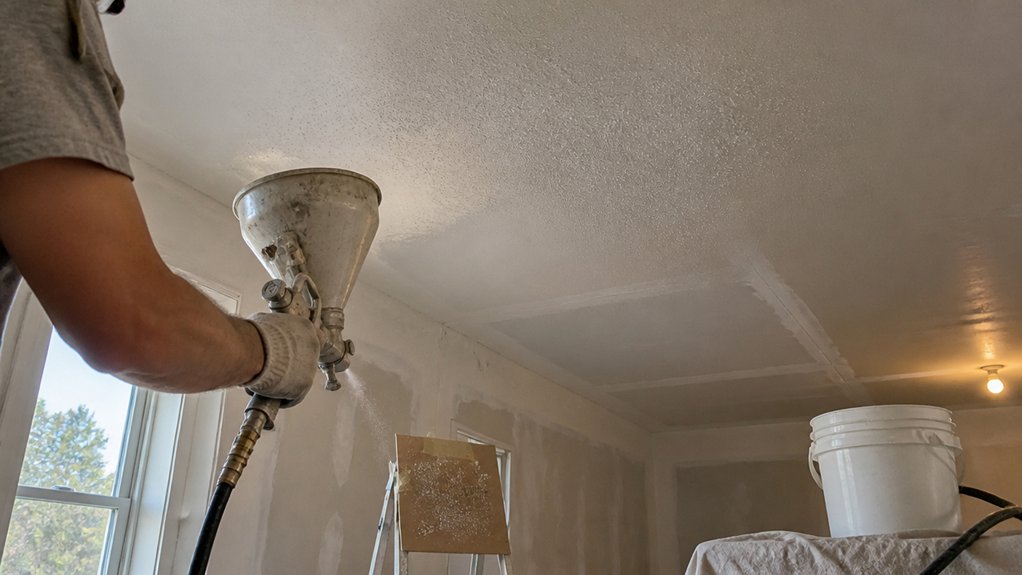
Adjust the texture gun before you point it at the ceiling, since getting this wrong makes a mess you will regret. Use a 3/8 inch nozzle for standard ceiling mud and set the air pressure to about 100 PSI. Too little pressure spits blobs, while too much turns the mud into a fine mist that lands unevenly.
> Dial in the texture gun before aiming up—3/8‑inch nozzle, 100 PSI—or you’ll scrape regret off the ceiling.
The hopper flow needs a medium trickle, not a pour, or you will flood the surface. I test on cardboard first to check the pattern. Set the air pressure so the spray makes a 1 inch round splat, then adjust the hopper so the mud feeds steadily without surging. For finer control over the spray pattern, swap in a brass tip from a precision-machined set that supports quick changes.
Hold the gun about 36 inches from the ceiling and move it in smooth, sweeping arcs. This keeps the overspray even and avoids thick patches that sag. I still wince thinking about my first attempt, which left a goopy mess I had to scrape off.
Patience is your best tool here. Dial in the settings, spray a test board, and only then commit to the ceiling. If you are working in a room with trim or floors, cover them with a drop cloth and use painter’s tape on any edges you want to protect. The texture dries fast, but the full cure takes a day, so wait before priming with a low VOC primer and applying your topcoat in the sheen you prefer.
Knock Down Ceiling Texture for a Smooth Finish
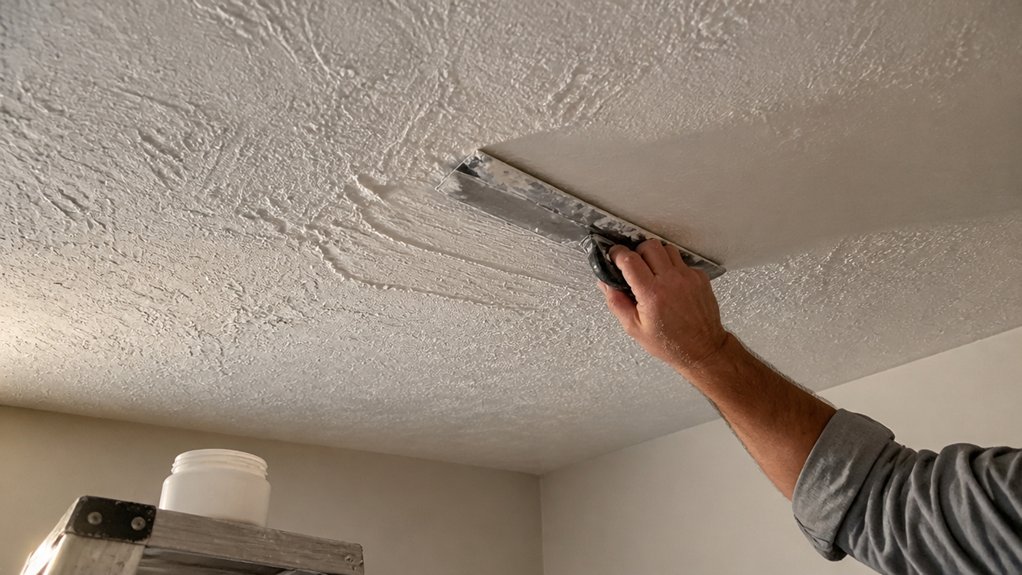
Once the ceiling has an even, uniform texture, the real work begins. Wait about 15 minutes, but check the product’s drying time so the mud is tacky, not wet.
Hold your 24-inch knockdown knife at a low angle, about 15 to 20 degrees from the ceiling. Flatten the peaks with light, sweeping strokes, working across the joists in the same order you sprayed.
If the angle is too steep, you will scrape the texture off entirely. If it is too shallow, you will just smear the mud, and both results look bad.
Clean the blade after every pass to keep the finish smooth. You want a soft, mottled stucco look, not a rough, cratered surface.
Dry spots will not knock down flat, so keep moving quickly across the ceiling. Once the whole surface is flattened, let it cure fully for at least 24 hours before any sanding.
Use a fine sanding grit, like 120 or 150, to knock down any ridges you missed. This gives you a smooth, forgiving base that is ready for a high-quality primer.
A low-angle knife and patient timing are the key to a professional result. After primer, you can apply a matte or satin topcoat, depending on the look you want.
For a more durable finish, consider a low-shrinkage compound that reduces the need for touch-ups on large areas.
Frequently Asked Questions
How Long Does Textured Ceiling Take to Dry Completely?
A textured ceiling typically takes 24 to 48 hours to dry completely, though this assumes a standard popcorn or knockdown finish applied at normal thickness.
Humidity is the biggest factor that can stretch that timeline, so if your space has over 60% relative humidity, expect closer to three or four days.
For a practical check, press a clean finger into a low spot after 24 hours; if it feels cool or leaves any residue, wait another full day before doing anything else.
I always recommend painting only after that full two day window, because sealing a damp texture traps moisture and causes peeling or discoloration later.
Run a dehumidifier or crack a window with a fan to speed up the cure, which is the same term you will see on product data sheets for drying time.
If you absolutely must touch it early, use a light sanding pass with 120 grit on just one small corner to test dryness, but never rush the process in damp weather.
What Primer Works Best Over Knockdown Ceiling Texture?
The best primer over knockdown ceiling texture is a high quality, stain blocking latex primer, which seals the porous drywall compound and prevents tannin or water stains from bleeding through. I recommend a product like Zinsser Bulls Eye 1-2-3 or a PVA primer if the ceiling is fresh and unpainted, but always choose the stain blocker for any previous water marks or smoke damage.
Use a 3/8 inch nap roller to press the primer into the texture’s valleys without leaving thick pools, and backroll with a light, even stroke to avoid stripping the peaks. Let the primer dry for at least two hours, or better, overnight, because knockdown texture absorbs moisture unevenly, and a fully cured base prevents your topcoat from flashing.
For the finish coat, apply two thin layers of flat latex ceiling paint with the same nap, allowing four hours between coats, and sand any rough ridges with 120 grit paper only after the primer is bone dry. Search for “drywall primer for textured ceilings” to find equivalent options, and remember that skipping the primer over bare joint compound will cost you an extra coat later.
Can I Paint Over Textured Ceiling Without Priming First?
Yes, you can paint over a textured ceiling without priming first, but it is a gamble that often leads to peeling and uneven blotches. The texture acts like a sponge, and raw drywall or old paint will suck moisture from your topcoat, compromising adhesion before it even dries.
Skipping the primer means your roller nap choice, whether a thick 3/4 inch or a thin 1/2 inch, cannot fix the underlying bond failure. Instead, use a high-build latex primer first, and allow it to dry for at least four hours before your finish coat.
One concrete tip: for a popcorn ceiling, use a 3/8 inch nap and roll on the primer, then check for any loose chunks by lightly tapping with a putty knife before painting. This extra coat also seals stains, so you avoid a second topcoat and get a uniform sheen.
For best results, consider a primer specifically labeled as a sealer, which is a related term that ensures you lock down porous texture. Trust me, the extra hour of work today saves you from a messy scrape-and-repaint job next year.
What Paint Finish Hides Ceiling Texture Imperfections Best?
A flat finish hides ceiling texture imperfections best because it diffuses light instead of reflecting it, which prevents shadows from outlining every bump and patch. This matte sheen, typically with a gloss level below 10 percent, acts like visual camouflage for that old popcorn or hand-troweled mess.
For the most forgiving result, apply two full coats of a high-quality flat ceiling paint using a 3/8 inch nap roller. Let the first coat dry completely for at least two hours before recoating, and avoid back-rolling once the paint starts to set, as that can pull up texture and create new ridges.
If you’re dealing with severe cracks or staining, spot-prime those areas with a shellac-based primer first, since it dries fast and seals without raising the existing texture. Searching for “low-sheen ceiling paint” will also steer you to the right product lines that offer extra hiding power.
How Do I Sand Texture Ridges Without Damaging Drywall?
To sand texture ridges without damaging drywall, feather the high spots with 120-grit paper on a sanding block, using only light pressure and a wide, sweeping motion. Focus on skimming the ridge’s peak, not pressing into the flat paper face around it.
After every two passes, wipe the area with a damp sponge to check your progress and keep dust down. This wet technique also prevents the paper from clogging, so you avoid gouging the soft gypsum core.
For deeper valleys, use a 220-grit sponge afterward to blend the edges, and remember that drywall compound is softer than the paper, so less is always more. If you press hard, you’ll create a hollow that needs another skim coat, which adds a full drying day. Let the area dry completely, then prime before painting to seal the sanded surface.
Rounding Up
Apply textured ceiling compounds step by step to get that grit overhead. Test your spray on cardboard first.
Adjust the air pressure to around 50 PSI and keep the gun moving. Start small and watch your mix, since thin mixes clog.
Keep a heavy hand from making a mess and rush the knock-down only if you want a spiky mess instead of smooth, modern stucco. A $15 bag of compound and an afternoon saves you a few hundred bucks over hiring a pro.
Ceiling texture