What Are Venetian Plaster Trowels? Types, Uses and How to Choose
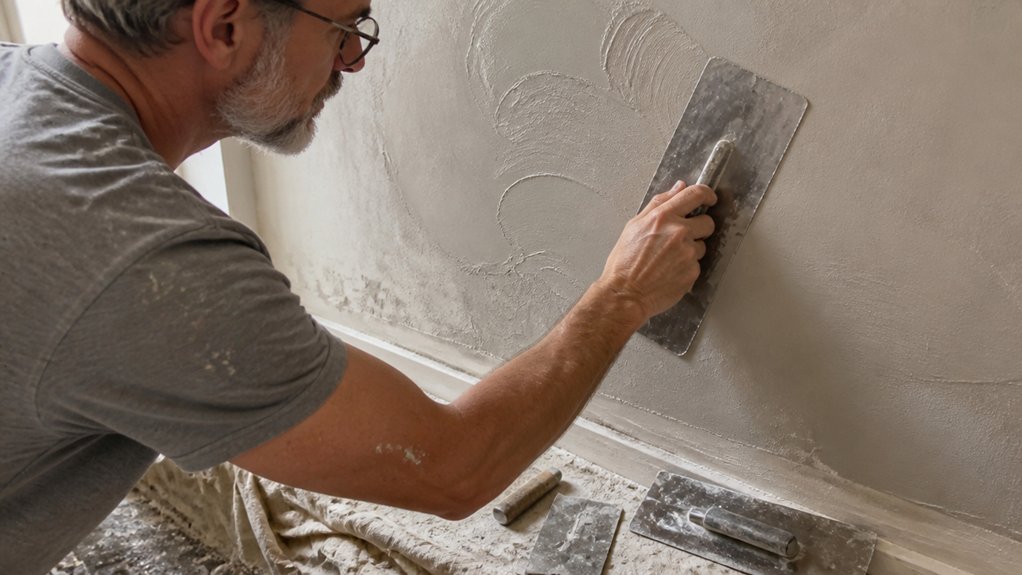
Chasing a marble sheen on Venetian plaster but your trowel keeps digging in? What are Venetian plaster trowels?
The types, uses, and how to choose one matter more than you might think.
They are not drywall tools: you need a rigid stainless blade for gritty base coats and a flexible carbon steel trowel for the final burnish.
This guide breaks down exact sizes and specs, including a 12 inch, flexible 8 inch, and 6 inch detail trowel for most walls.
Stick with it and you will know which trowel to grab for surface prep, coats, and that last polish.
Quick Answer
- Venetian plaster trowels use thinner, flexible steel blades to burnish without gouging.
- Rigid stainless steel blades suit base coats; flexible carbon steel blades final-polish.
- Choose 16-inch trowels for large walls; 6-inch detail trowels for corners.
- A starter set: 12-inch stainless, flexible carbon steel, and 6-inch detail trowels.
- Rounded corners prevent scarring near trim; blade flexibility builds gloss sheen.
What Makes a Venetian Plaster Trowel Different From Standard Tools?
A Venetian plaster trowel differs from a standard drywall trowel in two main ways. The blade is the first difference.
The blade is the first difference: thinner, more flexible steel with rounded corners instead of sharp ones.
The steel is thinner and more flexible, and the corners are rounded. That flexibility lets you press and burnish the plaster without gouging it, which helps you build the gloss or satin sheen you want on a marble finish.
The rounded corners are the second difference, and they matter when you work into tight areas. A standard trowel has sharp corners that can leave drag lines near trim, painter’s tape, or a wall edge.
Rounded corners glide so you can polish close to those edges without scarring the surface. If you want a smooth finish with a controlled sheen, choose the Venetian trowel and keep your sanding grit and topcoat schedule consistent.
A primer and topcoat can affect the final look. The trowel still controls how the plaster lays down and burnishes. Mirror-polished stainless steel blades resist rust and wipe clean, making them a practical choice for repeated finishing passes on light-colored surfaces.
Match Blade Material to Your Coat Type: Flexible or Rigid?
Pick blade material by matching it to the coat you are spreading and the sheen you want. A rigid stainless steel blade handles base coats and gritty prep coats with steady control, and it keeps its edge for thin, even layers.
For the final burnish coat, switch to a flexible carbon steel blade because its spring back presses plaster into a smooth, glassy finish. On painted work or clear wood finishes, check the sheen under final lighting so gloss, satin, or matte reads the way you want.
Two blades cover most jobs: keep one rigid stainless blade for prep and base coats, and one flexible carbon blade for polish and final passes. That pair lasts longer and costs less than a drawer full of specialty tools.
Good handles matter during long sessions, so choose a grip that keeps your wrist relaxed while you control the blade. Before you start, set up your space with a drop cloth and painter’s tape, and use the right sanding grit on the surface so the next coat can bond and level.
Keep a wet edge when you apply paint or finish to avoid lap marks and visible brush strokes. Watch drying time versus cure time before sanding or adding the next topcoat, and use a primer where the surface needs extra grip or stain blocking.
When you work with stain, varnish, or polyurethane, read the label for VOC level and recoat window so your finish cures without tackiness. Practice your blade angle and timing on scrap first, then carry that control into the real coat. Deep wells hold around 1.25 liters of paint, so you can maintain that wet edge longer without refill interruptions during large plaster or finish applications.
Select Trowel Size and Edge by Surface Area: Large Walls or Tight Corners?

Choose the trowel for the surface you are working on. That habit saves your arm and keeps the job moving.
For large open walls, use a 16 inch wide blade. The extra coverage helps you spread plaster quickly, keep a wet edge, and cut lap marks.
A small trowel on a big living room wall will slow you down and wear out your shoulder. Save the wide blade for broad passes across the wall.
Tight corners need a different tool. Use a 6 inch pointed or rounded detail trowel to work into corners without smearing fresh material onto adjacent coats.
Tape off nearby trim with painter’s tape and lay a drop cloth before you start. The edge profile matters: rounded corners suit sweeping strokes, while angled tips help you press material into reveals.
Measure your biggest wall and your trickiest corner. Then buy two trowels, one wide and one small, so you can handle most jobs without fighting the tool. For large projects, consider using a bulk kit to ensure you have enough supplies on hand.
After troweling, sand patches with 120 grit, spot prime, and apply your topcoat. For walls that show marks, pick a satin or matte sheen; use gloss on trim, and choose a low VOC primer indoors.
Keep brush strokes out of the wet edge and respect drying time before you recoat; cure time takes longer. When you mask stained or varnished trim, press painter’s tape down well so polyurethane and topcoat edges stay clean.
Which Venetian Plaster Trowel Set Should You Start With?
Build your first Venetian plaster trowel set with three tools and keep the cash for practice materials. Start with a 12 inch stainless steel rectangular trowel for base coats, because a stiff blade spreads plaster evenly.
A flexible carbon steel trowel handles burnishing, the final pass that brings up the sheen. Add a small 6 inch detail trowel for corners and tight spots where a wide blade can gouge. For stubborn residue on metal or glass, a carbide blade stays sharp far longer than standard steel.
Check the wall prep before you buy anything fancy: use painter’s tape and a drop cloth, and apply a low VOC primer if the surface needs it. Use the right sanding grit for the surface, then remove dust so the plaster bonds well.
> Prep the wall before you buy anything fancy: tape, drop cloth, right grit, no dust—plaster bonds to clean.
Watch drying time and cure time on the primer, and keep a wet edge when you work larger areas. Lap marks and brush strokes show up more under a gloss or satin sheen than under a matte finish.
A sealer or topcoat can change the final sheen, so test it on scrap before you coat a whole wall. If you also finish wood trim, keep stain, varnish, and polyurethane in a separate area from your plaster tools.
Skip the brand research and choose a moderately priced brand like Marshalltown or Kraft Tool. Technique beats gear, so spend your practice time on scrap board instead of shopping.
Those three trowels cover most walls, and your back will thank you. Buy the set, practice on scrap, and upgrade only if you keep going.
Frequently Asked Questions
Can I Use a Venetian Plaster Trowel on Regular Drywall?
You can use a Venetian plaster trowel on regular drywall, but it will not produce the same dense, polished texture as a proper plaster base. For drywall, a standard trowel or a flexible stainless steel trowel is more forgiving.
A stiff blade tends to chatter and skip, so for a test panel apply two tight coats of lightweight joint compound thinned to pancake batter consistency, letting each coat dry 24 hours and sanding lightly with 220 grit before the next. That approach gives you a practical plaster finish test without committing to a full wall.
How Do I Clean and Store My Trowels After Use?
To clean and store your trowels after use, wipe off coating residue promptly, dry them completely, and keep them in a dry place with the edge protected. For a practical routine, wipe the blade with a rag, then let it air dry for 10 to 15 minutes before applying a light oil coat.
Check the handle for tightness and clean any buildup around the ferrule or mounting area. Store the trowel edge-up in a dry cabinet or toolbox, and add a silica gel packet if humidity is high.
That routine covers finishing tool maintenance. If you use a stainless steel trowel for stains or varnishes, inspect the edge before the next coat and touch up any burrs with 400-grit paper.
Why Does My Plaster Trowel Leave Dark Grey Marks?
A plaster trowel leaves dark grey marks when poor quality steel or rust transfers onto the surface during finishing, causing metal abrasion stains rather than discolored plaster. Check your trowel for rust or burred edges before use, then wipe the blade clean and keep it dry between passes.
For a practical test, sand a small stained patch with 180 grit paper and apply a stain blocking primer before repainting. This metal transfer staining often looks like burned burnish marks, but the plaster itself is usually sound.
If the mark remains after sanding, seal the repaired area with a shellac based primer and recoat in two thin coats.
Can I Sharpen or Reshape a Worn Trowel Blade?
Yes, you can sharpen or reshape a worn trowel blade with careful hand work. Clamp the blade securely and draw a fine 220-grit diamond hone or wet/dry paper across the edge at the existing bevel, keeping the corners rounded rather than needle sharp. Light passes are safer than heavy pressure because you only want to restore the profile, not remove lots of steel.
Check the edge with a straightedge after every few strokes, and stop as soon as the nicks and rounded corners clean up. For routine trowel edge maintenance, a few gentle strokes before each plastering job will extend blade life.
Replace the trowel once the steel thins noticeably near the edge.
How Long Does a Quality Plastering Trowel Typically Last?
A quality plastering trowel typically lasts 10 to 20 years with regular care, though daily use shortens that lifespan. Think of it like a good brush: frequency and technique matter as much as steel grade.
Cheaper blades dull and wear quickly, while premium stainless steel holds a true edge longer. For a practical check today, clean and dry the blade after each session, then apply a thin film of light oil if it will sit unused for more than a week.
Store it flat or hanging, not tossed in a bucket with other tools. Treat it well and this finishing trowel will outlast most jobs and ambitions.
Rounding Up
Venetian plaster trowels come in types and uses you choose by matching flex to the finish and by picking for the job, not the show. Check your first coat and pick a flexible stainless steel blade because it is forgiving for that stage.
Compare a rigid trowel for the final burnished finish before you buy, and keep in mind that a flexible trowel on a ceiling can leave your arm aching. Ask about a basic two-trowel set, which costs roughly $60 and covers most walls.
Ceiling plastering with flexible trowels.