What Are Water-Based Drywall Primers? Types, Uses and How to Choose
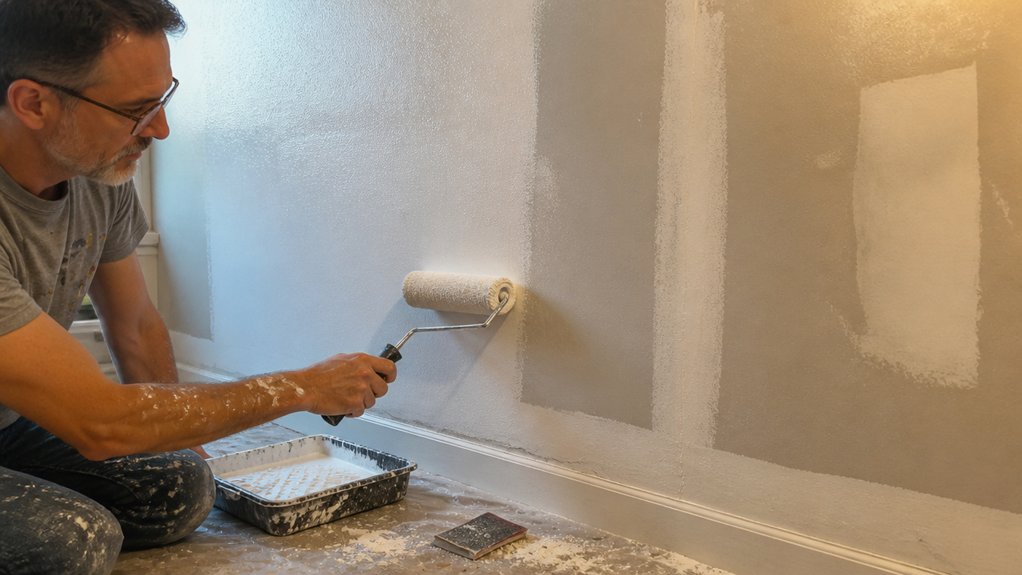
Fresh drywall can drink up your topcoat and leave a blotchy finish that no extra coat fixes. Water-based drywall primers seal gypsum board and joint compound so paint dries evenly and hides flaws.
This guide on what water-based drywall primers are, types, uses, and how to choose breaks down PVA, high-build, stain-blocking, and bonding options.
You will see how to match primer to sheen, coverage, and surface prep without overthinking it.
Stick around for the simple rules that save you a coat, a callback, and a gallon of wasted paint.
Quick Answer
- Water-based drywall primers seal gypsum paper and joint compound, ensuring even topcoat application.
- Five types exist: PVA, standard, high-build, stain-blocking, and bonding primers for varied surfaces.
- PVA primer suits fresh bare drywall with flat or matte topcoats; standard primer handles repaints and satin.
- High-build primer fills hairline cracks and texture in one coat, reducing sanding time.
- Avoid water-based primers on gloss, masonry, or slick surfaces; sand or use bonding primer instead.
What Is Water-Based Drywall Primer and When Should You Use It?
For new drywall, a water based primer gives you a clean first coat and helps you avoid a blotchy paint job. The formula is simple: water, acrylic resins, and additives that seal the thirsty gypsum paper.
I use it on fresh board, patched spots, and bare repairs before painting. Lightly sand patched areas with 120 to 150 grit, wipe off dust, and set out a drop cloth with painter’s tape on the trim.
Keep the room and surface between 50°F and 90°F while the primer dries. Drying time is about 30 minutes to touch, so you can add your topcoat in about two hours.
Keep the room and surface between 50°F and 90°F while the primer dries. Touch-dry in 30 minutes; topcoat in about two hours.
Check the label for full cure time before you scrub or wash the wall. Roll with a wet edge and watch for lap marks and heavy brush strokes near corners.
A low VOC primer is a good choice for indoor work when smell matters. Glossy surfaces need a different primer made for bonding, so scuff them with 220 grit first if you plan to coat them.
For fresh drywall, choose a PVA primer because it is cheap, fast, and saves you a second coat of paint. The topcoat sheen you pick, whether gloss, satin, or matte, comes after the primer has dried.
This primer is for gypsum board and patched walls. Use a wood primer under stain, varnish, or polyurethane on bare wood.
To improve coverage on highly porous drywall, reduce the manufacturer’s claimed square footage by roughly twenty percent, and consider a high-solids formula that functions as both primer and sealer to prevent flashing.
5 Types of Water-Based Drywall Primers
You will find five main water based drywall primers at the store. Picking the wrong one can cost you time and extra sanding.
Standard drywall primer is the basic choice for fresh drywall. It seals the paper face and chalky joint compound so your topcoat goes on evenly and does not soak in.
PVA primer is a budget sealer for new drywall and simple patch jobs. It dries fast, fills small pores, and works well under a matte or satin topcoat in rooms with light traffic.
High build primer lays down a thicker film to cover small dents and rough sanding marks. Use it when you need a smoother surface, then sand with 120 grit and wipe the dust before topcoat.
Stain blocking primer covers water stains, smoke marks, and tannin bleed that would show through paint. It also helps where old varnish or polyurethane on nearby wood trim wants to bleed into the finish.
Bonding primer helps paint stick to slick surfaces or surfaces that are hard to adhere to, including old gloss paint and some repaired areas. It gives you a safer base when normal primer beads up or scratches off.
Match the primer to the job before you lay a drop cloth or mask trim with painter’s tape. Check the label for VOC level, drying time and cure time, and recoat window, then keep a wet edge to avoid lap marks and brush strokes.
A good primer lets your topcoat hold its sheen, whether you choose gloss, satin, or matte. Read the label and test a small area first so you know how the primer and topcoat work together.
For the best coverage results, higher pigment concentration in your chosen primer ensures better hide and fewer topcoats are needed.
Standard Drywall Primer
Standard drywall primer is a reliable choice for most interior repaint and patch work. It gives you solid adhesion and seals the paper and joint compound so your topcoat goes on evenly.
Use this primer over painted walls after you clean them and dull any gloss or satin sheen with 120 grit sandpaper. Wipe off the dust, lay a drop cloth, and tape trim with painter’s tape before you start.
Apply it with a brush and roller, and keep a wet edge so you avoid lap marks and visible brush strokes. Drying time is about one hour, but cure time can run longer, so check the label before you recoat or sand.
Coverage runs about 300 to 400 square feet per gallon on typical drywall. The price is around $15 to $25 a gallon, which is fair for the peace of mind it gives on a basic interior job.
Check the VOC level on the label if indoor air quality matters to you. For tannin bleed or knots, use a blocking primer made for that problem and let it dry fully before your topcoat. Water-based formulas allow same-day topcoating without extra ventilation, which keeps the project moving on tight deadlines.
On wood, choose the stain, varnish, or polyurethane system the project calls for and follow its directions. This drywall primer works for drywall, patch repairs, and painted interior walls.
For most interior jobs, use this primer when you want a safe, predictable base coat. Clean the surface, apply an even coat, and let the topcoat sheen, whether matte, satin, or gloss, land on a uniform surface.
PVA Primer Specifics
PVA primer is a low cost sealer for bare drywall. It is polyvinyl acetate, a resin that seals the paper face and joint compound so your topcoat does not soak in unevenly.
Use it on new drywall that has no paint or coating. Keep it away from gloss paint, varnish, polyurethane, masonry, and other hard surfaces.
PVA works well under a matte, satin, or other low sheen topcoat. Glossy paint can crack and wrinkle over PVA because the primer film stays soft.
Coverage is about 300 to 400 square feet per gallon on a smooth wall. Check the label for VOC content if you are painting indoors and want lower odor.
Before you start, lay a drop cloth and set painter’s tape at trim and edges. Sand rough joint compound with 120 or 150 grit paper, then wipe off the dust.
Apply the primer with a roller and keep a wet edge so you do not leave lap marks. Brush the edges and corners to smooth brush strokes and help the film flow out.
Let the primer dry for the time listed on the label before you apply the topcoat. Drying time and cure time are different, so wait longer before you scrub the wall or hang anything heavy.
PVA will not block stains or bond reliably over existing paint. For patches, repaints, or stain blocking, use a standard drywall primer made for that job.
Use PVA on fresh drywall under matte or satin paint when you want inexpensive coverage. It saves money when you use it for that job.
For a thicker application on rough patches, use a gap-filling ratio of 1 part emulsion to 2 parts water despite uneven drying.
High-Build and Specialty
For drywall with dents, texture, or stains that regular primer cannot handle, choose a high build primer. These primers are thicker, like pancake batter, and that thickness does the work.
A high build primer can fill hairline cracks and minor surface chatter in one coat, which cuts your sanding time. I have used them on orange peel texture walls, and they filled the low spots without much effort.
For bathrooms, use a mold resistant primer as part of the job. For water stains, use a stain blocking primer so the stain does not bleed through your topcoat.
My favorite high build primer is USG Sheetrock First Coat, which costs around $30 a gallon. It works well on drywall repairs, though it still needs proper surface prep. This type of primer typically targets a wet film thickness of 10 to 25 mils to effectively bridge surface imperfections.
Sand the area with the right sanding grit, wipe off dust, and lay a drop cloth before you start. Keep a wet edge to avoid lap marks, and watch your brush strokes so the primer lays down evenly.
Check the drying time before you apply the topcoat, and remember that full cure time can be longer. Choose a topcoat sheen such as matte, satin, or gloss after the primer has dried and cured as directed.
Pick the primer that solves the surface problem, and let price come second. This approach will save you time and a callback.
PVA vs. Standard Water-Based Drywall Primer for New Drywall
For fresh bare drywall, PVA primer is the practical first coat. It seals the thirsty gypsum surface fast and costs a few dollars less per gallon than a standard water based drywall primer.
Standard water based primer shines on patches and previously painted spots. On new board, it adds cost and versatility you do not need for that first seal.
PVA bonds well under a flat or matte topcoat. If you plan a satin or gloss topcoat, check the primer label and use a primer rated for that sheen.
Prep the room with a drop cloth and painter’s tape before you open the primer. Sand dust spots with 120 grit, then wipe the dust so the primer can grip.
Roll with a wet edge to avoid lap marks, and keep brush strokes tight around edges. Follow the label for drying time before a recoat and cure time before heavy use.
Choose a low VOC primer if fumes matter in your work space. PVA is for drywall, so save stain, varnish, and polyurethane for wood projects.
Use PVA on new drywall and keep standard primer for touchups. Check the label for sheen and VOC before you buy. For damp areas, select a primer rated for moisture since most joint compounds are not water-resistant and will need that extra protection.
Match Water-Based Drywall Primer to Topcoat Sheen

Match the topcoat sheen to what the primer label allows. Check the label before you buy paint.
PVA primer is the budget choice for new drywall and basic bedrooms. Its label limits topcoat sheen to flat or matte.
Standard water based primer handles eggshell or satin in living rooms and repaints. It costs a little more than PVA and gives you more options.
High build primer works for textured patches and trim before semi gloss. It fills and builds the surface so the topcoat can sit smoother.
Gloss and sheen change how paint reflects light and how hard the dried film needs to be. Match the primer’s grip to the paint’s shine so the topcoat bonds.
A glossy topcoat over PVA can peel or lift. Oil-based formulas last longer than water-based ones, which helps when storing primers for future spot repairs. For most people, standard primer handles eggshell fine and saves a repaint.
Sand patches smooth with 120 or 150 grit sandpaper and remove the dust. Lay a drop cloth and use painter’s tape to protect the floor and trim.
Keep a wet edge when you apply the topcoat to avoid lap marks and heavy brush strokes. Drying time lets you recoat, while cure time is when the film reaches full hardness.
Check the label for both drying time and cure time before you sand or add a second coat. Low VOC formulas have less odor, but you still need airflow and enough drying time.
For wood trim or stained patches, use a primer that blocks stains and finish with varnish or polyurethane. Wipe dust off the walls and let the primer dry fully before you apply the topcoat.
Where to Use Water-Based Drywall Primer: and Where to Avoid It
A drywall screw poking through new gypsum board is a good cue to reach for a water based primer, but this product does not fit every surface. It works well on bare drywall, patched repairs, and dull painted walls.
On new drywall, a PVA primer seals the paper face and helps the topcoat cover evenly without flashing. Apply it with even brush strokes and keep a wet edge so you do not leave lap marks.
For patched repairs, let the joint compound dry, then sand it smooth with 120 grit paper. Spot prime the patch so the repaired area takes paint like the surrounding wall.
On previously painted walls with a dull satin or matte sheen, a thin coat of water based primer helps new latex paint bond. Wipe off dust and grease first, then apply the primer at the label’s drying time before you add the topcoat. Peak bond strength needs 24 hours of ambient curing for water-based primers.
Avoid water based drywall primer on high gloss surfaces. That slick finish can prevent a good bond, and the topcoat may peel.
If you must prime a glossy wall, sand the gloss first or use a bonding primer made for slick surfaces. Test a small area and check the sheen after it dries.
Skip brick, stucco, and other masonry surfaces with this primer. Those materials need a primer made to resist high alkali, because a drywall primer can fail there.
Stick to gypsum wallboard and similar interior drywall surfaces for this primer. Follow the label for drying time and cure time, and keep the room ventilated while it dries.
Coverage, Drying Time, and Tinting Limits
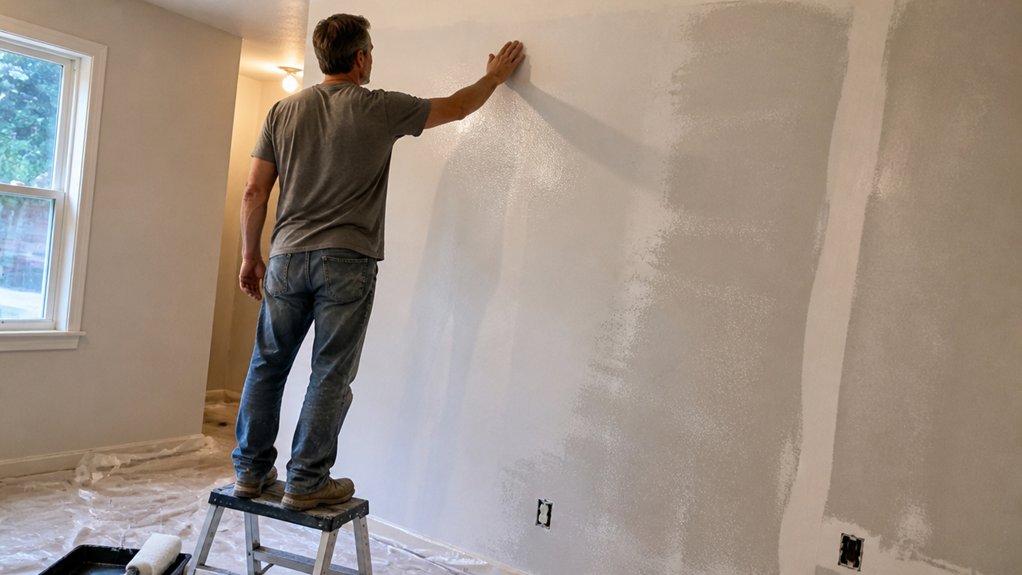
Paint coverage usually runs 300 to 400 square feet per gallon. Porous drywall can soak up more, so keep half a gallon on hand for small repairs.
At 77°F, the paint may dry to the touch in 30 minutes. Wait the full two hours before you apply the topcoat. For quicker touch-ups in tight spaces, consider a pre-filled touch up paint with a built-in roller that dries in ten minutes.
Cold or humid rooms can slow drying, and cure time can run longer than dry time. Keep a wet edge as you work so you avoid lap marks and brush strokes that show through the finish.
You can add up to 2 ounces of universal colorant per gallon. That amount can tint dark paint toward gray, and adding too much colorant can weaken a primer’s sealing power.
Check the sheen before you start, whether you want gloss, satin, or matte. Use painter’s tape and a drop cloth to protect trim and floors while the coating dries.
Sand glossy patches with 120 grit paper before you prime, and wipe off the dust. Low VOC products can help with indoor air, but they still need the same dry time and cure time.
Coverage Per Gallon
Coverage per gallon depends mostly on how thick you apply the primer and how much the surface soaks it up. Most water based drywall primers cover about 300 to 400 square feet per gallon at a moderate coat, so use that as your starting estimate.
On porous new drywall, plan for about 300 square feet per gallon. On patched or previously painted wallboard, 350 to 400 square feet is reasonable when you keep the coat even.
A thick nap roller loaded heavy can cut coverage to about 250 square feet per gallon. A heavier coat improves holdout, but it uses more primer and can leave lap marks if you work too slowly and lose the wet edge.
Measure the wall area first, and sand patches with 120 grit sandpaper before you prime. Lay a drop cloth, tape off edges with painter’s tape, and cut in with smooth brush strokes before you roll.
Check the label for drying time before you apply the topcoat, and pick a low VOC primer if fumes are a concern. If you tend to load the roller heavy, plan for 300 square feet per gallon or a little less so you can finish the job without a surprise second trip for more primer. For this reason, always confirm the primer meets ANSI Z87.1 impact standards if you’ll be wearing protective eyewear during sanding and priming.
Dry Time Factors
You have the primer on, you measured the room, and now you want to know when to apply the topcoat. Humidity is the biggest factor in drying time.
At 77°F and 50% humidity, the primer is dry to the touch in 30 minutes and ready for a topcoat in two hours. At 70% humidity, add a few hours to that schedule.
Temperature matters too, and the label gives the safe range. Below 50°F, drying slows a lot; above 90°F, the finish can skin over fast and trap moisture under the film.
Check the weather along with the clock, and wait an extra hour when the air feels damp. That extra wait costs less than sanding out a bad coat or repainting.
For stain, varnish, or polyurethane, follow the same logic and respect the drying time and cure time on the can. Lightly sand with 220 grit between coats, and keep a wet edge to avoid lap marks and heavy brush strokes.
A satin, gloss, or matte sheen can show lap marks and brush strokes, so apply an even coat and let it set before sanding. Use a drop cloth and painter’s tape to protect the room, and keep the space ventilated when the finish has a high VOC level.
Tinting Capacity Limits
Tinting a water based drywall primer has a real limit, much like adding extra shots to coffee. Most primers take up to 2 ounces of universal colorant per gallon, and that is the ceiling you should follow.
Push past that colorant load and the primer can get thin, adhere unevenly, and take much longer to dry. Those problems show up in the finish and cost you time on the job.
Heavy tinting cuts coverage to about 250 to 300 square feet per gallon, so plan on extra coats. Drying time can stretch from 30 minutes to more than 2 hours at 77°F, and high humidity makes it slower.
A slight sheen shift can also appear, and that extra gloss can spoil a flat or matte finish. Keep your coats even, watch your brush strokes and lap marks, and allow the full cure time before you judge the color.
Stay within the manufacturer’s tint limit and tint lightly. Let the topcoat carry the color load and keep the primer coat close to its normal tint level.
Surface Prep Rules for Water-Based Drywall Primer
A clean, sound surface helps a water based drywall primer bond well and dry evenly. Shortcuts here cost you extra coats and extra sanding later.
Lay a drop cloth and use painter’s tape to protect nearby trim before you sand. Sand every taped seam by hand and feel for ridges or rough spots.
Use 120 to 150 grit sandpaper to knock down high spots, then finish with 220 grit for a smooth seam. The primer will highlight any ridge or rough spot you leave behind.
Wipe all dust with a damp cloth before you apply the primer. A dry cloth pushes dust around and leaves a film that can hurt adhesion.
Check for loose paper and exposed screws, then cover them with joint compound. Let the compound dry fully, sand it smooth, and wipe the dust again.
These steps help the primer flow out and give your topcoat a more even sheen. When you roll the primer, keep a wet edge and work back into it to avoid lap marks.
Choose by Condition, Stains, and Cost
Pick the drywall primer by the condition of the walls, any stains, and the price you want to pay. This method will save you from buying the wrong can and repainting later.
For fresh drywall, use a PVA primer that seals the paper and joint compound, and sand with 120 grit before you prime. For old paint and patches, use a general purpose primer so the topcoat has a smooth base.
Stains need a primer made to block them, or water spots and marker can bleed through the topcoat. KILZ 2 is one option, and you should follow the label for drying time and cure time before you recoat.
For stains like water spots or marker, use a stain-blocking primer such as KILZ 2, and respect its drying and cure times.
PVA costs about $15 a gallon, but it will not cover stains. A general purpose primer costs $25 to $35 and can save you an extra coat.
Low VOC primers are available if fumes are a concern, and a drop cloth plus painter’s tape will protect the room while you work. Work in small sections and keep a wet edge to avoid lap marks and brush strokes.
Choose the topcoat sheen after the primer is dry, whether you want gloss, satin, or matte. Do not use varnish or polyurethane on drywall because those products belong on wood.
Frequently Asked Questions
Can I Paint Over Water-Based Primer With Oil-Based Paint?
Yes, you can paint over water-based primer with oil-based paint, but only after the primer is fully cured and has passed an adhesion check.
Oil-based compatibility varies by brand, so scuff a small hidden area with 220-grit sandpaper, wipe the dust, and apply a thin test coat.
Let that test patch dry 24 hours, then try to lift it with tape or a fingernail before committing to the whole surface. If it holds tight, apply your oil-based topcoat in thin coats and allow proper recoat time.
This quick oil over water primer compatibility check saves you from a costly repaint.
Will Water-Based Primer Raise the Grain on New Drywall?
No, a water-based primer will not raise the grain on new drywall like it does on bare wood. You may notice slight paper fuzz or a raised texture because moisture lifts loose paper fibers, but this is surface fuzz, not wood grain swelling.
Knock that fuzz down after the primer dries with a light pass of 220-grit sandpaper, using minimal pressure. Then wipe the dust and apply your finish coat.
For best results, use a drywall primer or drywall sealer made for new drywall, and avoid overworking the wet coating. That keeps the surface smooth and ready for paint.
How Long Should Drywall Cure Before Applying a Water-Based Primer?
Drywall should cure until the joint compound is fully dry before applying a water-based primer, usually about 24 hours in normal conditions. In cool, damp spaces, extend that to 48 hours and confirm the compound is hard and uniformly colored.
Temperature and humidity strongly affect joint compound drying time, so do not rush the primer coat. A practical check is to sand repaired areas lightly with 220 grit, then wipe the dust and look for a consistent dull surface before priming.
Use a moisture meter if you are unsure, and only prime when readings show the drywall and compound are stable. This patience protects primer adhesion and helps avoid a blotchy finish.
Does Water-Based Drywall Primer Need a Topcoat if Tinted?
Yes, a tinted water-based drywall primer still needs a topcoat for lasting durability and washability. The tint improves hide and helps you see coverage, but it does not replace the protective finish of paint.
Use a dedicated drywall primer sealer, let it dry fully, then apply two coats of your chosen wall paint. For most water-based primers, that means waiting about 2 to 4 hours before topcoating, and lightly sanding any rough spots with 220-grit first.
Skipping the topcoat leaves a chalky, less washable surface that can scuff quickly in high-traffic areas. Treat tinted primer as a prep coat, not a finish coat, and your paint job will hold up better.
Can I Use Water-Based Primer Over Wallpaper or Paneling?
I cannot recommend using water-based primer over wallpaper or paneling as a direct coating. Those surfaces need different prep, and a water-based product will not grip them well.
For wallpaper, remove loose paper and test a small area first, or use a wallcovering-specific primer if the paper is sound. For paneling, waterproof the paneled seams and seal wood knots with a shellac-based primer, then sand glossy areas with 120-grit paper.
Let the shellac primer dry about 45 minutes before recoating. This approach gives you a more reliable bond than forcing a water-based primer to do a job it is not made for.
Rounding Up
Water-based drywall primers seal porous paper, lock down dust, dry fast, and give paint a fighting chance on fresh board. Check whether the job is new drywall, patched spots, or stained spots before you choose a primer.
Write down the surface and match it: use PVA on new drywall, a stain-blocking version on patches or stains, use it on walls, ceilings, and trim, and skip metal or glossy surfaces. Compare a basic PVA with your finish paint budget; it costs about $20 a gallon and covers 300 square feet.
Types of drywall primers.