What Are Trim and Door Paints? Types, Uses and How to Choose

Trim and door paints are not just thicker wall paint. They use harder resins to resist dings and wipe clean, so your doors and trim hold up to daily use.
Oil-based alkyd offers durability but can yellow, while acrylic latex stays bright and low-VOC. This guide covers trim and door paint types, uses, and how to choose, including sheen, prep, and cost.
You will see why semi-gloss or high-gloss suits doors, what $30 to $50 per gallon gets you, and how primer, coats, and cure time affect the finish.
Read on to avoid prep surprises.
Quick Answer
- Trim paints use harder resins for durable, wipe-clean topcoats; wall paints stay soft and porous.
- Semi-gloss or high-gloss sheens suit trim and doors due to superior scuff and cleaning resistance.
- Acrylic latex enamel stays bright, low-VOC, and cleans with soap; alkyd yellows over time.
- Prime trim after filling, sanding, and degreasing to ensure stable adhesion and a smooth base.
- Apply two thin coats with self-leveling additives, maintaining a wet edge to avoid lap marks.
What Are Trim and Door Paints? Types, Uses and How to Choose
Choosing the wrong trim paint can keep you up at night. You may end up staring at brush strokes on your baseboards and wondering what went wrong.
Trim paint sheen does more than change the shine. It gives you the first defense against scuffs and grime.
Semi gloss is the sweet spot for most homes because it wipes clean with a damp cloth. High gloss adds durability on doors that get touched every day.
Door paint needs to hold up where hands and shoes meet wood, so buy a quality product for that job. Look for an acrylic latex enamel with self leveling additives.
These paints dry smoother and save you from heavy sanding later. A good gallon costs $30 to $50, and that price is worth it for trim and doors.
Use painter’s tape and a drop cloth before you open the can. Lightly sand with 220 grit paper between coats to knock down dust nibs and brush strokes.
Keep a wet edge while you paint to avoid lap marks and heavy brush strokes. Follow the drying time on the label before the next coat, and let the cure time pass before you scrub the surface.
For a clean finish, apply a primer made for the surface and then one or two topcoats. Choose satin or matte only where you can accept less scrubbing power.
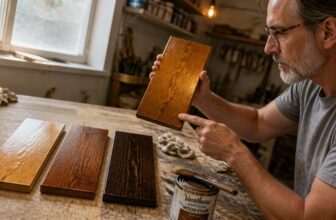
If you work on stained wood doors, use stain and a clear varnish or polyurethane for that job. Check the label for VOC content when indoor fumes matter. Fast-drying options like spray paint cans cover roughly 100 square feet per can for quick touch-ups on trim and doors.
Why Trim Paint Is Different From Standard Wall Paint
Wall paint will stick to a baseboard, but it stays soft and porous, so a vacuum bump can leave a white scar and dirt can grab hold. That soft film suits low touch walls, where a small scuff is easy to hide.
Wall paint clings to baseboards but stays soft, so bumps scar and dirt grabs hold—fine for low-touch walls only.
Trim paint uses harder resins and levels out as it dries, so it forms a tough topcoat you can wipe clean. On doors, casings, and baseboards, that shell stands up to scuffs and repeated cleaning. Semi-gloss finishes offer high durability and scrub resistance for these high-traffic surfaces.
Viscosity also changes how each paint behaves. Trim paint runs thicker, so it resists drips on vertical casings and can bridge small nail holes without sagging.
Wall paint is thinner and more watery, which helps it spread across large drywall areas. It also grabs dirt more easily and chips when something hits a corner.
For trim, start with a primer made for the surface, then apply a trim topcoat in a sheen that suits the room, such as satin, gloss, or matte. Use painter’s tape and a drop cloth to protect nearby walls and floors, and sand with the right sanding grit before the next coat.
Keep a wet edge while you work so brush strokes and lap marks blend, and check the label for drying time and cure time before you handle the trim. For stained wood trim, finish with stain and a clear coat of varnish or polyurethane, and choose a low VOC product if fumes matter.
Oil-Based vs. Latex Trim Paint: Which Finish Is Right for You

For most DIYers, acrylic latex is the easier choice for trim, but alkyd oil paint still gives the hardest finish when you need it. Start with the job and your time budget, then pick the paint that fits.
Alkyd oil paint dries to a hard film and holds up to dings on door casings and baseboards. It also turns amber over time, so white trim may need a fresh topcoat sooner than you expect.
Acrylic latex stays bright white and cleans up with soap and water. It has low VOC levels, little odor, and often costs less per gallon, which makes it easier to use indoors with a drop cloth and painter’s tape in place.
Latex is softer than alkyd, so it can show dents in busy spots. A quality primer and a satin or semi gloss sheen help the topcoat hold up, and a light sanding with 120 grit gives the paint a surface it can grip.
For application, latex gives you a longer wet edge and fewer lap marks, so brush strokes blend before they set. Watch drying time and cure time: the film may feel dry in an hour, but it keeps hardening for days.
Use a quality brush and lay off your final strokes in one direction. Keep a wet edge as you move around the room, and avoid overbrushing as the paint starts to set.
Alkyd oil paint costs more per quart, needs mineral spirits for cleanup, and has strong fumes that linger. Plan for good airflow and extra dry time when you use it.
If you are coating stained wood, old varnish, or polyurethane, sand with 120 grit, clean the surface, and use a bonding primer before the topcoat. That prep matters more than the brand on the can.
For ornate crown molding, many painters still reach for alkyd oil paint to get that smooth gloss finish. If you want easier cleanup and lower odor, use a quality acrylic latex in a satin or semi gloss sheen and give it proper dry time. Satin sheen provides durability and scrubbability, making it a strong choice for trim that sees frequent handling and cleaning.
How to Prep Trim and Doors Before You Paint
Use a degreaser to remove grease and grime before you paint. Dirt and oil can make the primer fail, so clean until the surface feels smooth and dry.
Fill nail holes and small dings with lightweight spackle. Let the filler dry fully before you sand it.
Set out a drop cloth and use painter’s tape to protect nearby surfaces while you work. This saves cleanup and keeps paint off the floor and nearby walls.
For sanding, use a medium grit sanding sponge around 120 grit. Sand the filler flush with light pressure and check the surface with your hand.
Wipe away sanding dust with a tack cloth before you apply primer. On bare wood, leave a slight tooth so the primer can bite into the surface.
A good primer coat gives the topcoat a stable base and helps the final sheen look even. Follow the drying time on the label, and remember that cure time is longer than dry time.
Choose a low VOC primer if odor or indoor air quality matters. Apply the primer with smooth brush strokes and keep a wet edge to avoid lap marks. Cleaning the brush with a proper comb helps maintain its bristles for the next coat.
Step-by-Step Guide to Painting Trim and Doors Like a Pro
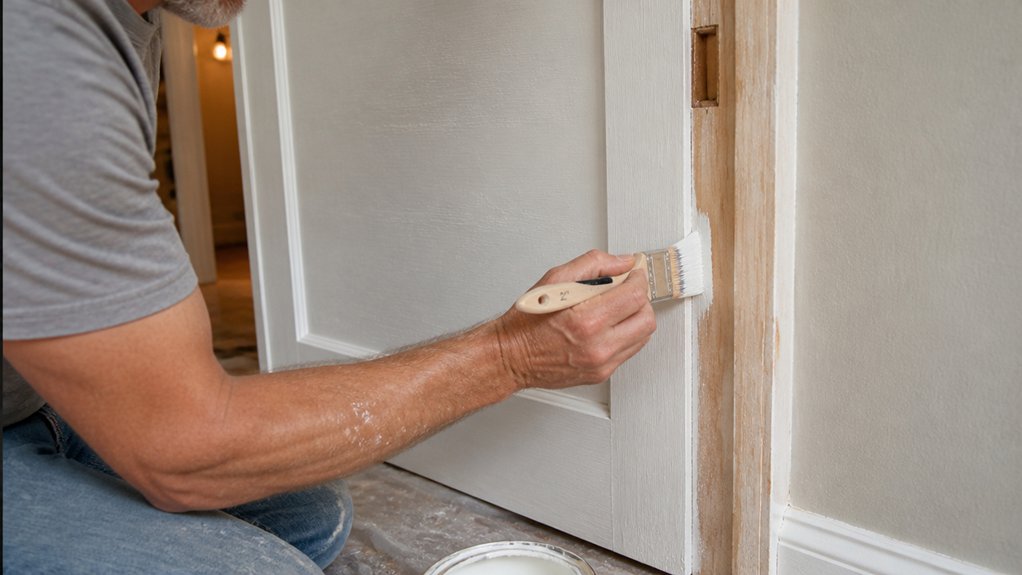
With prep finished, your next steps decide how the trim and doors look. Lay a drop cloth, apply painter’s tape, and sand glossy edges with the sanding grit the primer label recommends.
Load a dense foam roller and an angled brush lightly with paint. Keep the coat thin and work it enough to spread evenly without pushing it around.
A self leveling additive helps the paint flow out and soften brush strokes. For trim sheen, satin or semi gloss are easy to wipe clean and hide small nicks.
Use high gloss on doors when you want a hard, smooth topcoat. Cut in first, then roll while you keep a wet edge to avoid lap marks.
Apply two thin coats and let the first coat dry fully before the second. Check the label for drying time and cure time, then plan your day around that schedule.
Choose a quality acrylic enamel with low VOC if fumes matter to you. It costs more, but it levels well and cures to a tough shell.
For wood doors, stain followed by varnish or polyurethane can look great, but follow the label for sanding and recoat steps. A matte sheen can work on walls, yet trim usually needs a tougher finish. To boost traction on slick surfaces, mix in a clear non-slip additive compatible with your coating’s binder, such as one made from fine 50-mesh particles.
Frequently Asked Questions
Can I Paint Trim With the Same Paint Used on Walls?
You can paint trim with the same paint used on walls, but I would not choose wall paint for the job. Wall paint is softer, less durable, and rarely self-leveling, so brush marks and scuffs show up fast.
For trim, use a dedicated trim enamel or cabinet and trim paint with better bonding primer and hardness. Lightly sand existing trim with 220-grit, wipe it clean, and apply two thin coats rather than one heavy coat.
Check compatibility first, especially over old oil-based or unknown coatings, and test a small spot before committing. Expect color and sheen mismatch too, since wall paint often looks flatter next to trim’s gloss.
How Long Should I Wait Between Trim Paint Coats?
For latex trim paint, wait 2 to 4 hours between coats, while oil-based trim paint needs about 24 hours. Drying time and recoat time are not the same, so check the label rather than judging only by touch.
In cool temperatures, expect drying to take roughly twice as long, so do not rush the second coat. As a practical check, lightly sand cured trim with 220 grit if you feel dust nibs, then wipe it clean before recoating.
This simple sanding step helps the next coat flow smoothly and protects that factory-smooth finish.
Do I Need to Prime Previously Painted Trim?
You do not always need to prime previously painted trim, but I recommend priming it for dependable adhesion and stain blocking. A bonding primer helps prevent peeling and seals old stains before your topcoat.
If the existing coating is sound and you scuff it with 120-grit sandpaper, you can sometimes skip primer on those intact areas. Spot-prime any bare wood or sanded-through spots with an oil-based primer because it is compatible with latex topcoats and gives a solid base.
Let the primer dry according to the label, usually about one hour for many fast-dry primers, before applying your first finish coat. Use this approach whenever trim paint adhesion matters and you want a longer-lasting finish.
What Sheen Is Best for Hiding Trim Imperfections?
For hiding trim imperfections, a matte or flat sheen is best because it scatters light and softens small dings. It gives the best flaw coverage, though it sacrifices easy cleaning.
Prep is still essential: sand glossy trim with 220 grit, wipe off dust, and spot prime bare or repaired areas before painting. Use a low sheen trim enamel if you want a little more washability without highlighting flaws.
Apply two thin coats rather than one heavy coat, and let waterborne enamel dry at least 4 hours between coats. A flat finish hides better, but a matte or low sheen is a practical compromise for trim that gets touched.
Can I Use Trim Paint on Kitchen Cabinets or Doors?
You can use trim paint on kitchen cabinets or doors, but I would not recommend it. Trim paint is built for scuffs and trim durability, while cabinets need a harder, more damp-resistant finish.
Cabinet finish differences demand a cabinet enamel that stands up to daily greasy hands. For a practical start, scuff sand doors with 220 grit, then apply two coats of a waterborne acrylic enamel, allowing about 4 hours between coats.
That extra hardness pays off on kitchen cabinets and doors. If you want a trim paint shortcut, test a hidden door first and check for blocking after a week.
Rounding Up
For trim and door paints, choose a quality latex satin or semi-gloss such as Benjamin Moore’s Advance for most people. Check the surface and prep well before you paint, because you do not need a chemistry degree but you do need to respect the surface.
Apply thin coats so the finish levels out brushstrokes like a champ and cleanup stays a breeze. Compare latex with oil-based paint if you need extra toughness, but remember that oil-based is tougher, smelly, and fussy to work with.
Door preparation and paint cleanup basics.