
What Are Wood Hardeners? Types, Uses and How to Choose

Soft, rotted trim or a sill can feel like a replacement job, but wood hardeners often save it. They soak into decayed fibers and cure into a stiffer network before primer and paint.
This guide on what wood hardeners are, their types, uses, and how to choose keeps the fix practical.
You will see when acrylic suits shallow surface rot and when epoxy is better for deeper repairs.
We will also cover surface prep, cure time, and protective topcoats. Read on to pick the right product and apply it with confidence.
Quick Answer
- Wood hardeners are thin resins that penetrate soft, rotted wood, then cure into a stiff, reinforcing network.
- Choose acrylic hardeners for shallow surface decay; they cure in 1–3 hours with about ⅛-inch penetration.
- Epoxy hardeners suit deep rot, wicking up to an inch and requiring 6–24 hours to cure.
- Use an awl test: treatable wood resists sinking less than 1/4 inch; deeper rot demands epoxy or replacement.
- Always apply two primer and two paint coats afterward; hardener alone doesn’t seal against moisture.
What Is Wood Hardener: and How Does It Stabilize Rotting Wood?
Wood hardener is a thin resin that soaks into soft, rotted wood and cures into a stiff network. It locks loose fibers together so primer and filler have a solid surface to grip.
Use it on trim and repair areas where the wood still has some structure. It gives the repair a better chance to hold through seasonal movement and paint coats.
Skip watered down glue. It sits on the surface, peels later, and does not reach the decayed cells that need support.
A proper hardener costs about $15 to $25 a quart, which is cheap insurance against replacing a whole rotted section. Poke the wood with an awl; if it sinks less than a quarter inch, the wood is worth treating.
If the awl sinks deeper, replace the wood. Treat hardener as the first repair step before filler, primer, or topcoat.
Lay a drop cloth and mask nearby surfaces with painter’s tape before you sand. Sand cured filler with 80 grit, then smooth it with 120 grit before primer.
When you brush the topcoat, keep a wet edge to avoid lap marks and check brush strokes in raking light. Follow the label for drying time and cure time before you sand or recoat.
Apply stain or varnish only after the hardener has fully cured. For a clear finish, polyurethane works; check the label for VOC level and sheen, such as satin, matte, or gloss. Low-VOC options measure ≤50 g/L and are safer for indoor repairs.
Which Wood Hardener Type Should You Use: Acrylic, Epoxy, or Water-Based?
Three types of wood hardener fill most of the shelf: acrylic, epoxy, and water based. The right pick depends mainly on how deep the rot has reached.
For shallow surface decay, such as the top layer of a windowsill, an acrylic product or a polyurethane product with solvent will work. It cures in about 1 to 3 hours, and resin penetration is often only about ⅛ inch.
Deeper damage is where the choice between acrylic and epoxy matters. Epoxy such as Abatron LiquidWood can wick in up to an inch with repeat coats, and it takes about 6 to 24 hours to cure.
Deeper damage calls for epoxy, wicking up to an inch with repeat coats, curing in 6 to 24 hours.
Water based products have low VOC levels and suit indoor work near painter’s tape and drop cloths. They need bone dry wood, and they penetrate more slowly than products with solvent.
Before you apply any hardener, sand the area with the sanding grit your finish schedule calls for and remove dust. Check drying time and cure time before you apply a primer or topcoat, since the wood may still be curing after it feels dry.
For a windowsill you plan to paint, use acrylic on shallow rot and epoxy on deep or structural rot. For baseboards indoors, a water based hardener can keep fumes down while you prime and topcoat with a satin, gloss, or matte sheen.
Work with a wet edge and steady brush strokes when you apply the finish, and watch for lap marks on trim you plan to stain or varnish. A little extra sanding between coats helps the topcoat sit flat and show the sheen evenly. Verify manufacturer claims against hard data on crack reduction, since a product showing 90% improvement after one year outperforms one with 30% at six months.
How to Apply Wood Hardener, Including Dry and Cure Times

Fix the water source before you open any can. No wood hardener will fix a repair that still gets wet.
Scrape away loose rot until you reach solid wood. Vacuum the dust and lay a drop cloth if you are working indoors.
Brush on a saturating coat and let it soak for fifteen minutes. Apply a second coat if the first one soaks in fast.
Drying time and cure time are different. Most acrylic hardeners dry in one to three hours, but leave the repair overnight before you touch it. For repairs on wood that flexes or moves, check that the hardener’s chemistry is compatible with latex or polymer fillers you might use later.
Test the repair with a fingernail; it is ready when the nail will not dent the surface. Sanding cured hardener works, so use a mask and a sanding grit that suits the finish you need.
Before you apply primer or a topcoat, wait the full cure window. A solvent in the paint can lift the primer if the hardener is still curing.
For stain, varnish, or polyurethane, check the label and test a small area first. Keep a wet edge when you brush, and watch for lap marks and brush strokes.
Use painter’s tape to protect nearby trim and mask off areas you do not want coated. Choose gloss, satin, or matte topcoat to match the sheen on the surrounding wood.
Low VOC products are easier to use indoors, but they still need airflow. Prep like a pessimist and let the hardener cure like a patient person, and you will skip the repeat job.
Choosing a Stronger Penetrating Epoxy for Deep Rot vs. a Standard Hardener
Use a penetrating epoxy such as Abatron LiquidWood when rot runs deeper than about a quarter inch. For shallow rot, a standard hardener such as PC-Petrifier works.
Start with a screwdriver test. If the tip sinks past 1/4 inch, a standard hardener will not reach the rot. Since grain fillers serve cosmetic purposes only, fillers do not restrict seasonal expansion, so these repairs are for surface integrity rather than structural movement.
Start with a screwdriver test. If the tip sinks past 1/4 inch, a standard hardener won’t reach the rot.
For rot under 1/4 inch, use a standard hardener and expect a cure time of 1 to 3 hours. For rot from 1/4 to 1/2 inch, use LiquidWood thinned and allow 6 to 12 hours.
For rot over 1/2 inch, apply repeat coats of epoxy and let it cure overnight. On dense wood, use a high viscosity epoxy and allow 12 to 24 hours.
For structural rot, replace the wood and do not harden it. Epoxy viscosity matters because a thinner mix wicks deeper and a thicker mix bridges gaps.
You will pay about $40 per pint for the penetrating epoxy. That cost is easier to take than rebuilding the same spot next spring.
After the epoxy cures, sand with 120 grit and apply a primer. Then apply a topcoat in the sheen you want, such as satin, matte, or gloss.
Drying time and cure time are different, so let the epoxy cure before you sand or topcoat. Keep a wet edge and use smooth brush strokes to avoid lap marks.
Use painter’s tape and a drop cloth to protect nearby surfaces. If fumes matter, choose a low VOC stain, varnish, or polyurethane for the finish.
Why a Two-Coat Primer and Paint System Extends the Life of Hardened Wood
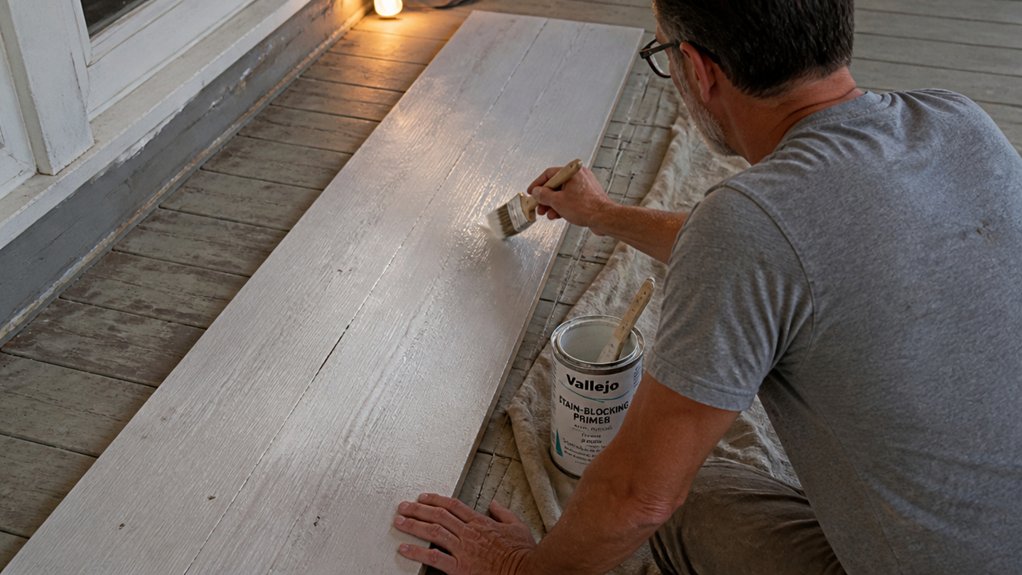
Hardener alone does not seal stabilized wood, so moisture can still get in and rot can return. A primer and paint system with two coats of each builds a moisture barrier and helps the repair last longer. Zinsser Bulls Eye 1-2-3 offers water-based adhesion to glossy surfaces without sanding, making it a strong option for this base coat.
Lay a drop cloth and use painter’s tape to protect nearby surfaces before you start. Sand the cured epoxy lightly with 220 grit to remove amine blush, the waxy film left after curing.
That film can ruin primer adhesion, so sand until the surface feels dull and clean. Wipe off the dust, then apply the first coat of primer and work it into the wood with steady brush strokes.
Keep a wet edge as you go so you avoid lap marks, and follow the label for drying time before the next coat. Sand the primer lightly with 220 grit if the label calls for it, then apply the second primer coat.
After the primer cures, apply two topcoats of paint and let each coat dry fully before you sand or recoat. Choose a gloss, satin, or matte sheen based on the look you want and the wear the surface will see.
If indoor air is a concern, pick a low VOC primer and paint. Two coats of paint add maybe $15 in materials and can double the life of the repair.
Frequently Asked Questions
Can I Paint Over Wood Hardener Before It Fully Cures?
No, you should not paint over wood hardener before it fully cures. Wait until the surface is dry to the touch, then give it a full overnight cure, roughly 12 to 24 hours of wood hardener drying time depending on the label and conditions.
Rushing the curing stage traps solvents, softens the film, and weakens paint adhesion. If you must test, sand a small hidden spot with 220 grit and check for a hard, dry film before coating.
For a safer schedule, apply your first coat after that overnight wait and let each coat dry per the product label.
How Do I Know if Rot Is Too Deep for Hardener?
You know rot is too deep for hardener when a depth probe shows more than ¼ inch of softness or you cannot reach solid wood underneath. If the wood feels spongy past that point, replace the piece instead of treating it.
For a quick check today, wrap tape around an awl at ¼ inch and push gently in several spots. If the awl sinks past the tape or the wood crumbles, skip the wood hardener and plan a wood rot repair.
Surface soundness matters more than a dark stain. Probe after scraping loose finish, then sand a small test area with 80 grit before deciding.
A hardener only helps firm, sound fibers, not soft, failed lumber.
Is Wood Hardener Safe to Use Indoors?
Wood hardener is safe to use indoors only with strong ventilation and sensible precautions. Treat it like a high VOC finish, not a casual craft glue, and work in a room where air moves out, not just around.
Set up a box fan blowing outward in a window and keep a second window cracked for make up air. Apply thin coats rather than flooding the wood, then let the piece cure for 24 hours before sanding lightly with 220 grit.
If you smell solvent after that, give it more time before bringing it into living space. For related guidance, search wood stabilizer indoor use and follow the label limits.
Can I Use Wood Hardener on Treated Lumber?
Yes, you can use wood hardener on treated lumber, but only when the wood is fully dry. Treated lumber compatibility depends on moisture content, so test it with a pin meter before applying any resin.
Aim for readings below 12 to 15 percent, and let new pressure-treated boards dry for weeks or months, not days. If the surface feels damp or the meter reads high, stop and let it dry; the resin will not penetrate wet wood properly.
For a small repair, sand the area with 80-grit, vacuum dust, then apply two thin coats of wood consolidant rather than one heavy coat. Damp wood wastes effort, so test first and follow the hardener label.
Will Hardened Wood Last as Long as New Wood?
No, hardened wood will not last as long as new wood because the treatment only penetrates a few millimeters. That shallow penetration leaves the core vulnerable, so any rot already inside can keep spreading under a sound-looking surface.
Treat lifespan as a fraction of new lumber, not a match, especially in ground contact or damp trim. For a practical test today, apply two coats of a penetrating oil sealer to a dry deck board and recoat when water stops beading.
If you are using a wood hardener, remember it is a localized repair, not a full preservative treatment. Plan on inspection and replacement sooner than you would with fresh, properly protected wood.
Rounding Up
Wood hardeners stabilize what is left of the wood, and the types split between epoxy for structural rot and acrylic for surface fixes. Test the wood today with a screwdriver: if you can poke it, harden it, and if you can pull it apart with your hands, replace it.
Compare epoxy and acrylic against the rot you find, then write down which area is structural and which is surface. Do not skip the primer, and apply the two-coat system as cheap insurance for the treated wood.
Related topic: Wood rot repair.


