What Are Matt Varnishes? Types, Uses and How to Choose

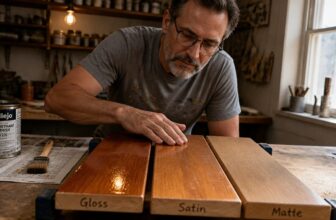
Matt varnish is a flat topcoat that cuts glare so wood grain shows, but it is not right for every project. A glossy sideboard or bookshelf can date a room fast, while kitchen tables need more toughness because matte shows scuffs.
This guide to what matt varnishes are, their types, uses and how to choose starts with resin and sheen. Acrylic resists yellowing, polyurethane adds toughness, and water based formulas suit light woods like oak.
You will also get surface prep, coats, drying time and fixes for common mistakes. Use it to choose and apply the right finish with confidence.
Quick Answer
- Matt varnishes are low-sheen finishes that reduce glare while keeping wood grain visible.
- Types include oil-based polyurethane (warm amber) and water-based acrylic (clear, pale finish).
- Choose matte for low-traffic furniture like sideboards; gloss or satin suits kitchen tables.
- Flat sheen shows scuffs, dirt, and scratches easily on floors and high-contact surfaces.
- Apply multiple thin coats, sanding between coats, to ensure durability without altering sheen.
What Exactly Is Matt Varnish and Why Choose It?
Matte varnish is a topcoat with a flat sheen. It cuts glare and keeps the wood grain visible.
Durability is good enough for most furniture, and it resists scratches and dampness. The flat sheen shows scuffs and dings more than gloss or satin does.
Use it on a sideboard or bookshelf where you want quiet character. For a kitchen table, choose gloss or satin so wear marks blend in better.
Use matte varnish on sideboards or bookshelves for quiet character; for kitchen tables, pick gloss or satin so wear blends in.
Prep by sanding to 180 grit and wiping off dust; apply stain or primer as needed, then a matte varnish or polyurethane topcoat. Use painter’s tape and a drop cloth, and pick a low VOC product if fumes matter.
Keep a wet edge and brush with the grain to reduce lap marks and visible brush strokes. Follow the label for drying time and cure time before you put the piece back into service. For best results, select a water-resistant but not waterproof formula that will protect against minor spills without trapping moisture in the wood.
The Main Varnish Types by Component: Acrylic, Polyurethane, and More
For a matte varnish, choose the resin by how the piece will be used, then pick the sheen last. Use this guide to compare acrylic, polyurethane, nitrocellulose, and alkyd varnish without the sales talk.
Acrylic varnish is the easy pick for furniture and touch up work because it resists scratches, resists yellowing, and stays flexible. It also keeps a clear look over stain when you apply thin coats and keep a wet edge to avoid lap marks.
Polyurethane brings serious toughness for floors and tabletops, and a satin or gloss topcoat can stand up to daily use. It may drift warm over the years, so test it on a hidden spot if color matters. When you need a durable clear coat, check whether an oil-based formula is right, since it dries harder and more abrasion resistant than water-based versions.
Nitrocellulose dries fast and sprays easily, which helps on small indoor decorative pieces. Heat and humidity can make it brittle, so keep it away from floors, tabletops, and other hard use surfaces.
Alkyd varnish gives outdoor work good grit, but it is heavier to apply and needs more care with brush strokes. Sand to the right grit, remove the dust, and lay down a primer or sanding sealer before the topcoat when the label calls for it.
Set up a drop cloth and use painter’s tape to protect edges before you open the can. Check the VOC level and work with airflow if you are using varnish in a closed room.
Let drying time pass before sanding between coats, and let cure time pass before heavy use. A test board helps you check the sheen and how the varnish sits over stain before you commit to the whole piece.
Match the varnish to the job: acrylic for clean furniture and touch up work, polyurethane for floors and tabletops, nitrocellulose for small indoor pieces, and alkyd for outdoor work. Pick the varnish that fits how the piece will be used and how you want the finish to look.
Water vs. Oil: How Each Solvent System Changes the Finish

Water based matte varnish and oil based polyurethane each change the finish in a different way. Water based varnish dries fast and keeps the wood clear, while oil based polyurethane adds warmth and turns more amber over time.
Use water based varnish when you need quick work and low odor in a small room. It has low VOC, dries to the touch in about an hour, and takes a second coat in roughly two hours.
Matte, satin, and gloss sheens look different once the varnish settles, so test the sheen on a scrap board first. A rushed water based coat can dry slightly frosty, so sand between coats with 220 grit and keep a wet edge to avoid lap marks and brush strokes. Varnish film thickness directly impacts durability, so aim for multiple thin coats rather than one thick layer.
Oil based polyurethane gives oak and similar woods a rich glow that many people like on furniture. It smells stronger, dries slower, and can yellow toward orange after several years.
Oil based polyurethane gives oak a rich glow, but it smells stronger, dries slower, and yellows over time.
Sanding oil based polyurethane smooth is often easier, but you must allow for both drying time and cure time. Lay a drop cloth, use painter’s tape at edges, and keep the room vented while the topcoat sets.
On bare wood, use the primer or sanding sealer the varnish maker recommends. A stain can deepen the color before the topcoat goes on.
For a light wood project on a tight schedule, use a water based matte varnish and test the sheen on a scrap board first. For a deep furniture look on oak, use oil based polyurethane and plan extra days for the finish to cure.
Best Surfaces for Matt Varnish: Wood, Floors, Brick, and Metal
Matt varnish works on furniture, floors, brick, and metal, but each surface needs a different product. I learned that after refinishing a coffee table twice.
For wooden furniture, use a waterborne matte topcoat such as General Finishes Flat Out Flat ($35 per quart). It keeps the grain visible and gives a low sheen without glare.
Floors and masonry need a tougher finish that resists scuffs and dampness, so check the label for VOC level and recoat time, sand at 220 grit, and keep a wet edge while brushing. Avoid lap marks and heavy brush strokes, and let the finish cure fully before you use the piece. No sanding between coats saves time, as water-based formulas like TotalBoat Halcyon allow for multiple coats per day without intermediate scuffing.
Wooden Furniture Finishes
Matte varnish on bare wood is a strong match. I once painted a coffee table with gloss and spent three years regretting it.
The flat sheen lets the grain show without glare, and bare wood does not need a primer under clear matte varnish. The topcoat holds up well against scratches and dampness when you prepare the surface.
Sand to 220 grit, wipe off the dust, and use a tack cloth before you apply the first coat. Thin coats work better than one thick coat, and they help you avoid lap marks and heavy brush strokes.
Keep a wet edge as you brush, and pull the brush with the grain. For a kitchen table, choose a water based matte polyurethane with low VOC.
It resists yellowing and dries fast, which makes it a good choice for daily use. Drying time is short, but cure time takes longer, so give the finish time to harden.
Lay a drop cloth and use painter’s tape to protect edges and nearby surfaces. If you want to change the color, apply stain before the matte varnish and test the whole finish on scrap wood first.
For open-grain oak, apply a thin first coat and allow ten minutes of dry time before proceeding.
Floor and Masonry Durability
A matte or satin varnish can work on floors, brick, and stone, but floor wear tests a finish harder than a tabletop ever will. High traffic areas will punish a weak film fast, so choose a finish made for the job.
For wood floors, use a polyurethane matte that resists scuffs and dampness without turning glossy in spots. Check the label for sheen and VOC content, and use a drop cloth plus painter’s tape to protect nearby surfaces.
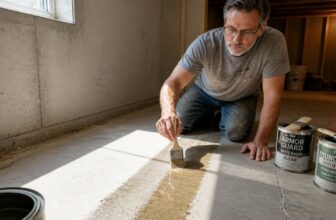
For brick or concrete, a masonry sealer needs to soak into the surface, so choose an acrylic or alkyd matte that penetrates porous material. That penetration helps stop dusting and chipping, and it gives you a base for the topcoat.
Do not use a furniture varnish on patio pavers, because it will peel quickly under weather and foot traffic. If the surface is bare or chalky, apply a primer first and sand with 120 grit when the label allows.
Apply two thin coats with a brush or roller, keep a wet edge to avoid lap marks, and watch for brush strokes as the finish levels. Follow the label for drying time and cure time, since a floor can feel dry long before it is ready for heavy use.
If you want to change the wood color, apply a stain before the clear topcoat and let it dry fully. For interior wood floors, use a water based polyurethane, and for exterior masonry, use a solvent based acrylic. For heavy-duty interior wood floors, a product like Minwax Fast Drying Polyurethane resists coffee rings and scuffs while offering a warm satin glow.
How to Match the Varnish to Your Location and Wood Tone

Before you open a can of varnish or polyurethane, ask where the piece will live and what wood tone it already has. The wrong finish can make oak look like plastic, even when the wood underneath is beautiful.
Match the varnish to light, moisture, and traffic first. A sunny window or a damp room calls for a finish that holds up, so read the label for VOC level and compare drying time with cure time.
Then test the wood tone under good light. A clear gloss topcoat pushes the grain and color forward, and satin or matte softens sheen and hides small flaws. Water-based formulas allow easy soap and water cleanup if you make a mistake.
Prepare the surface before you open the varnish. Use a sanding grit suited to the wood and the finish step, wipe off dust, stain the wood if you want more color, and lay a drop cloth with painter’s tape to protect the edges.
Work with a wet edge to keep brush strokes and lap marks from showing. Let the finish dry fully before you judge the sheen, and keep dust off the surface until cure time is over.
Location & Exposure Match
Before you open a can of matte varnish, ask where the wood will live and what it will face. A hallway table in Arizona has different needs from a driftwood bench by the sea.
Coastal damp and salt air will chew through a basic finish, so use a marine grade product. For that job, I reach for a solvent based hybrid or yacht alkyd urethane, and I set up a drop cloth and painter’s tape before I open the can.
The fumes are strong and the VOC load is high, so work outside or ventilate well. Indoors, a water based acrylic varnish is a good choice because it resists wear and does not amber.
On high traffic floors, skip matte and use satin or gloss, since a flat sheen shows scuffs and dirt. Apply a primer if the wood is bare, then sand with the right sanding grit before the topcoat.
Keep a wet edge while you work to avoid lap marks and visible brush strokes. Check drying time and cure time on the label, because a finish that feels dry may still need days to cure.
Stain and varnish behave differently from polyurethane, so test a small area and read the label. Match the finish to the place and the use, then keep your coats thin and clean your tools between coats. For exterior projects, UV filters are critical to prevent the wood from graying and degrading under direct sun exposure.
Wood Tone Enhancement
Think about how the finish changes the wood color before you open the can. A water based matte varnish keeps oak pale and crisp, close to a Scandinavian look.
An oil based polyurethane adds a warm amber tone and deepens cherry or walnut while the grain still shows. I once put water based polyurethane on mahogany and got a flat, pale plank.
That mistake taught me to match the topcoat to the wood. Dark woods usually look richer with an oil based finish, and light woods hold their color better with a water based finish.
Check the label for an ambering rating because cheap oils can turn maple orange after two years. Sand to 120 or 150 grit, wipe off the dust, and lay down a drop cloth before you start.
Tape off edges with painter’s tape and keep a wet edge so you avoid lap marks and heavy brush strokes. Apply thin coats and respect the drying time before you recoat.
Give the last coat time to cure before you judge the sheen or put the piece into hard use. A matte or satin sheen hides small flaws better than gloss, and lower VOC finishes are easier to use indoors.
If you use a stain or primer, test that full sequence on a scrap first. Your eye is the final judge, so let the varnish bring out the wood’s natural color and grain. For a more even base before varnishing, a finely ground pigment stain helps prevent streaky or blotchy results on porous woods.
When to Skip Matt Varnish: High-Traffic Areas and Imperfections
Matte varnish shows wear quickly in areas with heavy foot traffic. Kitchen tables, hallway floors, and paths where dogs run will show scuffs, shiny spots, and blotches sooner than you expect.
> Matte varnish wears fast where feet are heavy—kitchens, hallways, dog paths show scuffs and shiny spots sooner than you’d think.
Use satin or gloss in those spots because the sheen hides marks better and a topcoat usually holds up longer. Check the surface for flaws before you open the can.
Deep matte makes dings easier to see. Gouges, filler patches, and uneven grain stand out under a matte finish, so fix them before you apply any primer or topcoat.
Sanding with the right grit helps level repairs and improves adhesion. Wipe off dust, lay a drop cloth, and tape edges with painter’s tape before you start.
On floors, matte can wear thin in a few months. Ring stains on tabletops can become permanent, and fingerprints gather around cabinet handles.
Baseboards show scuffs against the flat sheen. Every imperfect repair is easier to notice under matte.
When a finish needs to hide repairs, use stain or a tinted filler to blend them before you apply the topcoat. If the area gets touched often, choose a harder finish, such as polyurethane, gloss varnish, or satin varnish. For heavier coverage over large surfaces, pure white natural bristles hold varnish well for smooth, even release.
Watch your application: keep a wet edge, avoid lap marks, and check brush strokes as you go. Follow the label for drying time and cure time, and use good ventilation when the product has a high level of VOC.
Applying Matt Varnish Without Mistakes: Brush, Rag, or Spray
Choose an applicator that fits the piece and the finish you want on your varnish or polyurethane. I have used brushes, rags, and sprayers, and each one can leave a mess if you rush the work.
For a big flat surface like a tabletop, use a good synthetic brush. It lays down an even coat fast, and you keep a wet edge so lap marks do not show.
Work the varnish lightly and stop before it gets sticky. If you overwork it, brush strokes will show in the topcoat.
A lint free cotton rag works well on curved pieces and intricate trim. Wipe on a thin layer and let the rag do the work, which keeps bubbles low.
Spraying gives the smoothest finish when you want a matte, satin, or gloss sheen with no brush strokes. You need a spray gun or rattle cans, and a basic setup costs about $15 to $30.
Set up a drop cloth and use painter’s tape before you open the varnish. Surface prep matters, so dust the piece, sand lightly with the right sanding grit, and wipe it clean.
Check the humidity before you apply the first coat. Above 70% humidity, varnish may dry cloudy and may not cure properly.
Read the label for drying time and cure time, and pay attention to VOC warnings. A primer or stain changes the look, so test a scrap first if you are unsure.
For quick jobs, use a brush and keep the coat thin. For detail work, use a rag and wipe on a thin layer.
For the smoothest finish, spray in thin passes and let each pass set before the next. Match the tool to the shape of the piece and the sheen you want.
Fixing and Recoating Matt Varnish: Sanding and Long-Term Care
Matte varnish takes marks from daily life, including scratches, toy dents, and a sweating water glass. Most of that damage is fixable with light sanding and a fresh topcoat.
Matte varnish shows daily wear, but light sanding and a fresh topcoat fix most damage.
Sand lightly with 320 grit and wet sand to keep the paper from clogging. If bubbles appear, pop them, sand the area flat, and apply a thin recoat.
Clean off all dust before you recoat because dust will show in the sheen. Use a tack cloth after sanding, and lay a drop cloth when you work over a floor or table.
For scratches, rub the area with fine steel wool, then buff gently to blend the sheen. Keep the pressure light so you do not change the gloss level or leave lap marks.
Recoat within 48 hours when possible. If more time has passed, scuff the surface first so the new coat can bond.
Apply the topcoat with steady brush strokes and keep a wet edge to avoid lap marks. Check the label for drying time before sanding and cure time before heavy use.
For ongoing care, use soap and water and skip harsh cleaners that carry strong VOC solvents. This routine has saved plenty of tables, and a dull matte finish can often come back with a light sanding and a fresh coat.
Satin and gloss finishes need the same care, though their sheen shows scratches differently. You do not need primer for a maintenance recoat on a sound finish.
If you work near stain, varnish, or polyurethane topcoats, use painter’s tape and a drop cloth to protect the edges. Then sand lightly, recoat, and let the finish dry fully.
Frequently Asked Questions
Can Matt Varnish Be Applied Over Existing Paint?
Yes, matt varnish can be applied over existing paint when the coating is compatible and fully cured. Paint compatibility matters most, so confirm the existing finish is a cured oil, acrylic, or water-based product before you start.
Use a test patch first, then let it dry for 24 hours and check for wrinkling, lifting, or poor adhesion. Clean the surface with a degreaser and lightly sand with 320 grit if the paint is glossy, then remove all dust.
Otherwise, you risk peeling or poor adhesion, especially over uncured or contaminated paint. Apply two thin coats of matte clear coat rather than one heavy coat, and allow proper drying between layers.
How Many Coats of Matt Varnish Are Needed?
Two to three coats of matt varnish are needed for proper durability, though raw wood may need three coats for a perfectly smooth surface. Apply each coat evenly and let it dry fully before judging the finish.
For a practical routine, sand lightly with 220 grit between coats and wipe away dust; this helps the matte finish level without adding unnecessary build. More coats do not always mean better, so stop once the finish looks even and feels smooth.
If you are chasing a flawless result, use three coats on raw wood and check the surface after the final sanding. Keep the coat count practical rather than piling on extra varnish.
Does Matt Varnish Require a Primer Before Use?
No, matt varnish does not require a primer before use. It is a protective clear finish, not a paint, so primer is unnecessary and can add a needless coat that dulls clarity on bare wood.
For surface preparation, clean the wood, sand with 220-grit paper, and remove all dust before applying. Apply two thin coats of the varnish, allowing about 2 hours between coats at room temperature.
This clear matte finish bonds well to bare wood when the surface is properly prepared. A light sanding with 320-grit between coats improves smoothness and helps the next layer grip.
Can Matt Varnish Be Tinted With Color Pigments?
Matt varnish can be tinted with color pigments, but keep the dose low and test first. Stir universal tint into a small batch, starting with about 1 part tint to 20 parts varnish by volume.
Apply a thin coat to scrap wood and let it dry fully before judging the color. If the tone is too weak after that coat, add tint in tiny increments rather than pouring more in at once.
For a practical test today, tint 8 oz of matt varnish with no more than 5 percent pigment, brush it on a spare board, and check coverage after two coats. This matt varnish tinting method helps you avoid a muddy finish and confirms color fastness before you commit.
How Long Does Matt Varnish Last Before Recoating?
Matt varnish typically lasts about 2 to 3 years before recoating indoors, though high traffic areas may need yearly attention. For a practical benchmark, lightly scuff the surface with 220 grit paper and wait the full 24 to 72 hour cure time before adding another coat.
Check the finish every six months by wiping it clean and looking for worn or dull patches. If you see bare wood or a visibly thin film, move up your matt varnish recoat schedule rather than simply adding more coats over a failing surface.
Rounding Up
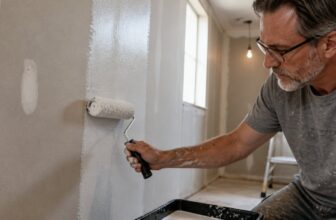
For matt varnishes, choose acrylic water-based for walls or furniture and polyurethane oil-based for floors, but know they kill glare, hide nothing, and require upkeep. Check every nick before you commit, because matte shows them.
Compare acrylic water-based for walls or furniture with polyurethane oil-based for floors. Write down where you will skip matte, such as stair treads or busy hallways.
For light reflection, a matte floor reflects just 10% of light versus gloss’s 80%. Matte is for looks, but the upkeep is real.
Acrylic water-based versus polyurethane oil-based finishes.