How to Apply Liquid Rubber Coatings: Step-by-Step Guide
Liquid rubber coatings fail when the surface underneath is neglected, not because the product is weak. If you are tired of cracked, peeling patches on concrete or metal, the fix starts long before the first coat hits the surface.
This guide walks through the full process, from power washing and drying to priming bare areas and pressing fabric into wet sealant. You will learn how to layer three coats with proper drying time and cure time for a 40 to 50 mil finish that lasts.
Keep temperature and humidity in check, and you can avoid the scraping nightmare of a botched job.
Let’s break down each step so your next project holds up for years.
Quick Answer
- Prepare and dry the surface completely; power wash, mask edges, and remove loose material first.
- Select the correct primer for substrate—bonding for concrete, etch for metal—and never skip it.
- Embed 4-inch fabric into wet sealant over cracks, pressing from center outward to remove air.
- Apply three coats crosswise and diagonal, waiting 6–8 hours between each, with wet-edge laps.
- Maintain 50–86°F, under 80% humidity, and avoid rain or fog for 24 hours post-application.
Why Skipping Surface Prep Kills Your Liquid Rubber Job
Liquid rubber is not forgiving, even though it looks like a simple thick black coating. Treat it like a fussy topcoat that needs a clean, dull surface before it will bond. If you skip the prep, you are signing up for peeling, bubbling, and leaks within a few months.
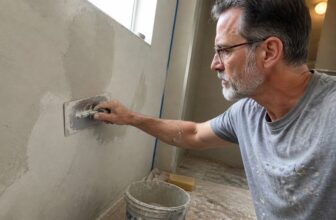
I have watched this fail more times than I can count, usually right after the first heavy rain. Start with a power washer using plain water to strip off dirt, oil, and loose paint. No soap needed, and let the surface dry completely before you even open the can. Remember that dust kills adhesion immediately, so even a light breeze can compromise the bond.
Concrete can feel damp, but it must never be wet to the touch. If you are working on asbestos sheeting, do not blast it with pressure, just hand-clean gently with a stiff brush and water.
Concrete can feel damp, but it must never be wet to the touch.
The entire waterproofing lifespan depends on this cleaning step, so think of it as your primer coat. A lazy hour of scrubbing can cost you years of protection, which is a bad trade.
Take the time to prep right, or you will be redoing this job and explaining the stained garage ceiling to your spouse. I have been in that spot, and it is not a fun conversation.
How to Choose the Right Primer for Concrete and Metal

The fastest way to ruin a flawless waterproofing job is to use the wrong primer, or to skip it altogether. I’ve learned that the hard way, so trust me on this one.
For concrete, screed, or brick, you need a bonding primer. For raw steel, galvanised metal, or zinc, grab an etch primer instead. Never swap them, never mix them, and always apply a full coat over the entire surface, not just the patched spots.
| Substrate | Primer Type | Key Spec |
|---|---|---|
| Concrete, screed, brick | Bonding primer | Coverage: about 6 m² per litre |
| Raw steel, galvanised, zinc | Etch primer | Coverage: about 6 m² per litre |
| Painted metal, Chromadek | Etch primer | Dry time: follow the label |
Let the primer dry completely before you roll on the topcoat. Check the dry time on the label, it usually takes 1 to 4 hours. If you rush this step, you are inviting peeling, bubbling, and leaks later. For tricky glossy or smooth metal surfaces that resist bonding, a multi-purpose primer can grip without sanding or deglossing, saving you prep time.
Match the primer to the surface, measure your coverage, and wait out the drying time. It is a simple routine that saves you from a messy redo, and it keeps your paint job looking sharp.
Reinforce Cracks and Seams With Fabric Before You Coat

With the primer locked down, you’re ready to stop the leaks for good. Cracks and seams are where water gets in, so you need a flexible bridge that moves without splitting.
That bridge is fabric embedded into wet sealant. Cut the fabric 4 inches wide, and press it into the sealant while it’s still wet, never onto a dry surface. Start at the center and smooth outward to push out air bubbles, and pull the fabric tight to avoid wrinkles. Let each layer tack up before adding the next, or you’ll fight a sticky mess.
This fibermesh gives the rubber a backbone, so a small crack can’t grow into a leak. Skipping this step is like patching a hose with a Post-it note, it just won’t hold. It’s boring work, but it’s the difference between a real fix and a temporary one. To flatten the embedded fabric evenly, a seam roller with dual sealed bearings helps press the mesh into the wet sealant without disturbing the layer beneath.
This fibermesh gives rubber a backbone, so a small crack can’t grow into a leak. It’s the difference between a real fix and a temporary one.
Use a 4-inch brush to work the sealant into the fabric, and keep a wet edge so you don’t leave brush strokes that trap air. Let the patch dry completely before you roll on the topcoat, and check the label for drying time versus cure time. A quick dry doesn’t mean it’s ready for foot traffic.
How to Apply Three Coats Without Thin Spots or Laps

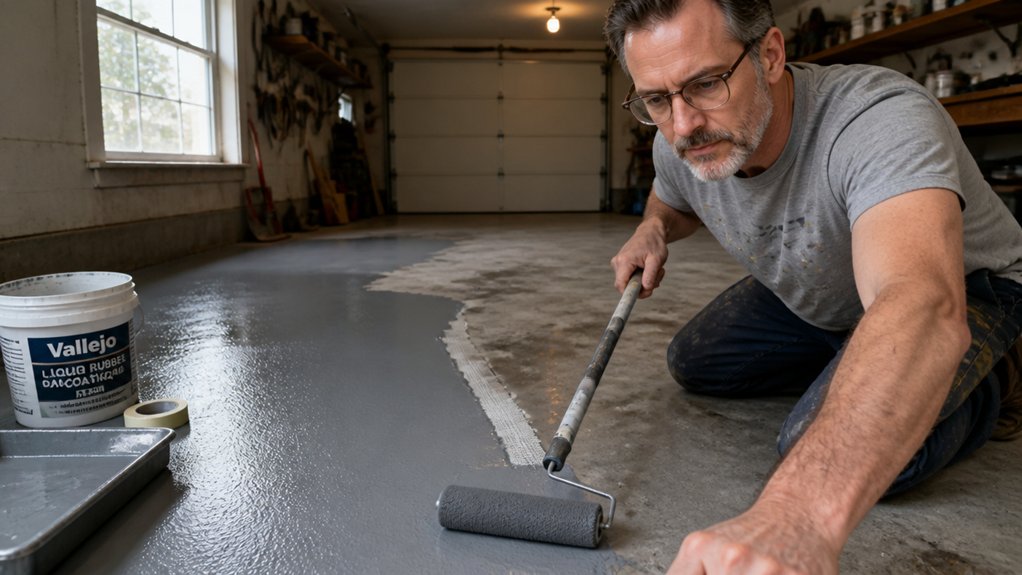
Roll on the first coat with steady, even pressure, but don’t try to cover the whole roof in one pass. Work in 10-foot squares and lap each wet edge by 4 to 6 inches, so you never end up with thin spots that need patching later. Skipping this step means chasing pinholes for years, and that’s no fun for anyone.
Do the math before you buy. At 32 square feet per gallon, a 20-square roof needs about 6 gallons per coat, so measure your roof twice and buy once. Coat two goes on crosswise to coat one, then coat three runs diagonal to that. Each layer builds to 40 or 50 mils of dried film, which is your real waterproofing armor, not just a surface skim.
Let each coat dry for 6 to 8 hours before the next one. A tacky surface is fine to recoat, but a wet one will lift and cause washouts, so don’t rush it. Three even coats beat one thick slab, and they last far longer without blistering or cracking.
Use a roller with a 3/4-inch nap for better pickup on rough surfaces, and keep a wet edge by rolling back into the previous strip before it skins over. Watch for lap marks at the edges, especially in hot sun, and feather them out with light pressure as you go. If you see brush strokes or roller tracks, smooth them while the coating is still wet, not after it dries. A thermal-bonded spiral seam prevents lint from sticking in the wet film and creating bumps that compromise the finish.
A low-VOC acrylic roof coating keeps fumes down and cleans up with soap and water, which beats solvent-based options for a DIY job. Lay a drop cloth over any gutters or siding you want to protect, and use painter’s tape to mask off vents or flashing. Sanding isn’t needed between coats on cured acrylics, but wipe the surface with a damp rag to remove dust before recoating.
The Temperature and Humidity Rules That Prevent Washout

Thermometer and hygrometer readings decide whether your paint job lasts or fails. I learned this the hard way on sticky mornings when the coating just wouldn’t behave.
Your safe window for air and surface temps is 50°F to 86°F. Above 86°F, the paint skins over before it bonds to the substrate, leaving a weak topcoat that flakes later.
Below 50°F, the cure time drags and the film stays soft, so dirt and moisture get trapped in the finish. Keep relative humidity under 80%, and check that your surface sits at least 5°F above the dew point.
That dew point gap stops condensation from forming on the wood or primer, which would ruin the bond before you even roll on the first coat. On humid days, I use a pocket hygrometer and an infrared thermometer to verify both readings before I mix anything.
If the numbers are borderline, wait an hour and check again. It beats sanding down a full polyurethane job or stripping varnish that never hardened right. Pinless moisture meters can also help you confirm the substrate is dry enough beneath the surface before you commit to coating.
You also want to watch the wet edge when you paint in warm weather, because faster drying time means lap marks show up easily. Keep a wet edge by working in smaller sections and laying off each pass before the sheen starts to dull.
For a satin or matte finish, the same rules apply, but gloss shows every mistake, so respect the temperature limits even more. Always use a drop cloth and painter’s tape to protect the floor, and check the VOC label on your primer or stain, since some solvents flash off quicker in heat.
When the conditions are right, you get a smooth, even film that cures fully over days, not hours. That patience pays off in a finish that looks clean and lasts for years.
Optimal Temperature Range
Check the thermometer before you open that bucket of liquid rubber, because temperature and humidity will make or break the job. I’ve sprayed in a heatwave and watched a perfect coat turn into a sticky, peeling mess, so trust me on this one.
The ideal range is 50°F to 86°F for both air and surface temps, and that’s your whole game plan. If it pushes past 95°F, the coating skins over before it bonds, trapping solvents underneath and ruining the cure.
Late spring or early fall are your best seasons, when nights stay warm enough to keep the cure steady. Check the 24-hour forecast before you start, because a cold snap will slow drying time dramatically and leave you with a weak finish.
Work in the cool morning hours instead of late afternoon to avoid thermal shock, which can cause the topcoat to lift or crack. Stick to that window and you’ll dodge the washout trap; it feels boring, but boring wins every time.
Use a drop cloth and painter’s tape to protect the surrounding area, and don’t skimp on surface prep before you lay down that primer. A clean, dry substrate at the right temperature gives you a proper wet edge, so you won’t see lap marks or brush strokes when you roll on the varnish or polyurethane.
Keep an eye on humidity too, since high moisture in the air slows the drying time and can dull a satin or matte sheen into a cloudy finish. If you’re working with a high-VOC product, good airflow matters, but don’t let a breeze drop the surface temp below that 50°F floor.
Remember that drying time and cure time are not the same thing; the coat may feel dry to the touch in hours but takes days to fully harden. So after you finish spraying, keep the area within that temperature range for a full 24 hours, and you’ll get a gloss that holds up without any sticky surprises. For metal surfaces, check that you’re using a formula with heat resistant ratings that tolerate up to 400°F for under-body areas, so the cured coat won’t burn away under high-temperature exposure.
Humidity and Dew Point Limits
Temperature and humidity always work together, and the dew point is what really decides if your coating will survive the night. I have seen people check their weather app, see 70°F, and call it good, then wonder why their fresh paint washes off by dawn.
You need at least a 5 degree spread between the dew point and your surface temperature, so grab a hygrometer and check the wet bulb reading if you want to be thorough. High humidity stretches drying time like cold molasses, so keep it under 80 percent, no exceptions.
If the forecast calls for rain or fog within 24 hours, pack up your brush and drop cloth for the day, because you are done. Nothing is sadder than recoating a runny mess on a primer that never set.
A dry air, a warm surface, and a clear forecast are your only friends here. Before you open that can of polyurethane or stain, wipe the surface down, check your sanding grit is right, and confirm the air is dry so you avoid lap marks and brush strokes.
Drying time is not the same as cure time, so even if the topcoat feels dry to the touch, the wet edge can still trap moisture if humidity spikes overnight. Keep your painter’s tape on until the job is fully cured, and use a low-VOC product if you are working indoors.
Stay practical: warm the surface with a heater if needed, but never paint when the dew point is close, and always wait for that clear forecast. That is the whole trick, and it saves you from stripping a ruined finish later.
Skipping a Step? Here’s What Fails and How to Avoid It

Most liquid rubber failures come from skipping one step, usually the primer or the third coat. I’ve watched it happen for years: someone rushes, saves twenty minutes, and pays eighteen months later with peeling, blistering, or leaks.
Primer failure isn’t mysterious, it’s just adhesion gone wrong. The coating cure time is a hard rule, not a suggestion.
Skipping primer means the membrane lifts off the surface like a bad toupee. That’s because the primer grabs the substrate and gives the rubber something to bite into.
Two coats instead of three? You get a weak, thin film that cracks early under foot traffic or weather. The third coat adds the real thickness and toughness.
Ignoring the 6 to 8 hour wait between coats traps dampness underneath. That trapped moisture turns into bubbles that pop later and let water in.
Coating over rust or chalky paint is just decorating a disaster. You need to sand, scrape, or wire brush down to a sound base first.
Rushing the 72 hour full cure is the biggest mistake of all. If rain hits before that cure finishes, the water washes your work right off the surface. Application temperatures must stay between 50°F and 90°F for proper curing of water-based formulas.
Use painter’s tape to mask edges, lay down a drop cloth to catch drips, and check the VOC label for proper ventilation.
A wet edge is your friend when you’re rolling on that rubber, so keep the coat moving without stopping. Drying time means the surface feels dry, but cure time means the film is fully bonded and waterproof.
Follow every step in order, and you’ll get a smooth, lasting membrane. Skip one, and you’ll be stripping it off and starting over. Your call.
Frequently Asked Questions
Can I Apply Liquid Rubber Over a Damp Concrete Surface?
No, you cannot apply liquid rubber over a damp concrete surface, as the moisture will cause adhesion failure and peeling. The coating needs a dry substrate to bond properly, so always start with a moisture test using a plastic sheet taped down for 24 hours.
If condensation or beads appear underneath, the slab is still too wet. For a fresh pour, wait at least 28 days of curing time, then check with a calcium chloride test for a reading below 3 pounds per 1000 square feet.
Dry the surface thoroughly with fans or a dehumidifier for 48 hours if needed. After that, lightly sand with 60 grit to open the pores, then broom off all dust before rolling on your first coat.
This same prep applies to primers and sealers, so treat every layer with the same patience. A damp slab will always win, so never skip the wait.
How Long Should Primer Dry Before Applying the First Coat?
Primer should dry for 1 to 4 hours before applying the first coat, but the exact time depends on the product label and the humidity. Do not rely on a clock alone; always perform the plastic sheet trick by taping a small piece of plastic wrap over a patch of primer.
If condensation forms under the plastic after a minute, the primer is still releasing solvents and needs more time. When it feels tack-free to the touch but not slick, you are clear to topcoat.
For fast results, use a shellac-based primer, which dries in 30 to 45 minutes in good airflow. A sanding pass with 220 grit between primer and paint helps adhesion, but only if the primer is fully cured, which may take overnight for water-based formulas.
Can I Use the Same Primer on Both Metal and Concrete?
No, you cannot use the same primer on both metal and concrete. Metal needs an etch primer to grip the smooth surface, while concrete demands a bonding primer to penetrate its porous, alkaline profile. Using the wrong one will cause the coating to peel or blister within months, so I always match the primer to the substrate for a lasting seal.
For a quick fix today, scuff bare metal with 120-grit sandpaper and apply a thin etch coat. On concrete, use a high-pH bonding primer and wait at least 24 hours before topcoating, as moisture in the slab must escape. If you’re unsure, check the label for “substrate-specific” or ask for a multipurpose acrylic only when the surface is prepped and dry. Never skip a compatibility test on a small patch, since contamination and efflorescence ruin adhesion fast.
What Happens if I Apply a Fourth Coat for Extra Protection?
Applying a fourth coat for extra protection will deliver a modest durability boost, but it introduces real adhesion and moisture trapping risks. Each additional layer extends the curing time significantly, and a thick film can lock in solvents or dampness from the coat below.
I recommend sticking with three coats for most projects, especially on exterior wood or high-moisture areas. The extra thickness from a fourth coat often leads to delamination or peeling down the road, which is far worse than the slight gain in protection.
As a practical tip, if you absolutely need more build, sand the third coat with 320 grit after it cures for a full 48 hours, then apply a thin fourth coat. Even then, test on a scrap piece first, and remember that proper film thickness per the manufacturer’s spec is your safest guide for long-term finish integrity.
How Soon After the Final Coat Can I Walk on It?
You can walk on it after 6 to 8 hours, but only for quick trips across the floor. The surface will feel dry, yet the coating underneath is still soft and vulnerable to scuffs, so treat it like wet paint.
Wait a full 72 hours before placing rugs, furniture, or heavy foot traffic back on the surface. This cure time is critical for moisture resistance; even a humid night can soften the film and leave permanent marks from your shoes.
I would always plan to sleep on it overnight and then test a corner with your thumbnail. If it dents, give it another 12 hours. Use cotton socks for those early walks, and avoid kneeling for at least a week. Remember, a full cure beats a fast finish, so let the solvent evaporate naturally. Check the can’s label for recoat windows if you plan a second layer.
Rounding Up
Applying liquid rubber coatings starts with surface prep, because the coating only bonds as well as the substrate beneath it. The article’s core message is that skipping prep turns a simple job into a scraping nightmare, so treat cleaning and priming as mandatory stages, not optional shortcuts.
Check the forecast before you open the bucket, since the coating needs dry conditions to cure properly. Write down the manufacturer’s recommended temperature window and drying time, then test a small patch area first to confirm adhesion.
Prepare the surface by removing all loose material, dirt, and old failing layers, since a clean, rough profile is what creates that seamless, waterproof barrier. Compare your surface condition against the guide’s checklist for cracks or moisture issues, and fix those before you roll.
Trust the coating to do its job once you’ve followed the steps, because a proper application gives you a ten-year fix instead of a quick patch. The reward for your tedious grunt work is a dry basement and a barrier that laughs at rain.
Read next about repairing cracks before applying any liquid membrane.