How to Apply Water-Based Varnishes: Step-by-Step Guide
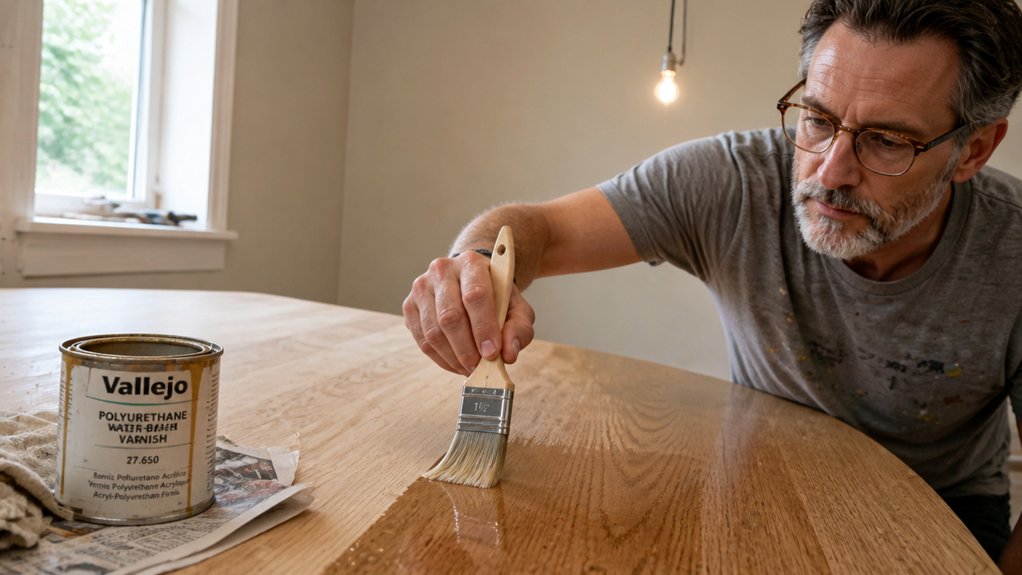
Applying water based varnish feels risky until you know one thing. Thin, translucent coats are non negotiable for a glassy finish.
Surface prep matters just as much, so vacuum, fill cracks, sand with 120 grit, then wipe damp. Use a Chinex or Taklon brush, never natural bristles, unless you enjoy ruined tools.
You will apply three thin layers and sand with P320 between each coat. This guide covers the exact drying times and cure schedule to keep you from ruining your project.
Quick Answer
- Prepare wood by vacuuming, filling cracks, sanding with 120-grit, and wiping damp.
- Use synthetic brushes (Chinex/Taklon) or 10mm microfiber rollers for water-based varnish.
- Apply thin, near-translucent coats; first seals and raises grain, dry 2–4 hours between.
- Sand between coats with P320-grit, clean with tack cloth, apply three total layers.
- Maintain wet edge continuously; full cure takes one week before heavy use.
Prep Your Surface the Right Way to Prevent Varnish Failures
Varnish fails when the surface underneath isn’t prepared right. I’ve learned that skipping prep is like baking a cake in a greasy pan, you end up with a mess you can’t scrape off.
Skipping prep is like baking a cake in a greasy pan—you end up with a mess you can’t scrape off.
So I vacuum the wood, fill every crack with wood filler, then sand with 120-grit paper. After sanding, I wipe the whole surface with a damp cloth to grab the dust before any stain or primer goes on.
The room’s climate matters just as much as the sanding. I check the thermometer and humidity gauge like a nervous parent before I open a can of polyurethane.
Keep the shop between 15°C and 35°C, with humidity under 75%. If it’s too warm or too dry, the varnish dries too fast and leaves an orange-peel texture that ruins the gloss. Heat and low humidity can accelerate drying by roughly 30%, so you must adjust your recoating schedule accordingly.
Clean the dust, sand to a smooth base, and control the room’s temperature and moisture. That’s the whole secret to getting a wet edge that levels out without brush strokes or lap marks.
Your topcoat will flow on even, dry to a nice satin or matte sheen, and last years longer. Just remember that drying time isn’t the same as cure time, so give the finish a full week before heavy use.
Choose the Best Brush or Roller for a Smooth, Even Coat

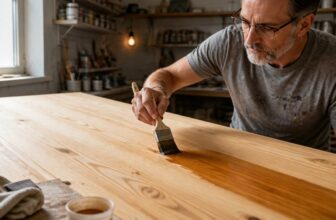
Start by picking the right tool, and you will save yourself a lot of frustration. For trim and edges, choose a fine synthetic bristle brush made of Chinex or Taklon, since water-based varnish destroys natural hair.
Cheap brushes shed bristles and leave streaks you will have to sand out later. I use a 2-inch angled brush and load it lightly, never dunking it halfway up the metal ferrule.
For large flat surfaces, a microfiber roller with a 10mm nap gives the smoothest coat. A short nap keeps orange peel to a minimum, and you should roll with steady, light pressure instead of pressing down hard.
Let the roller glide across the surface and keep a wet edge as you go, which prevents lap marks from forming. When working with a topcoat like polyurethane, remember that drying time is not the same as cure time, so wait the full cure period before sanding between coats.
Spend about $15 on a decent brush and a good roller sleeve, and you will get a smooth, even sheen. A $5 brush leads to visible brush strokes, so buy once and finish the job right. White China bristle offers a hollow-fiber alternative for oil-based varnishes, but for water-based coats, stick with synthetic options like Chinex to avoid swelling and premature wear.
Apply Thin Coats and Sand Between Them for a Durable Finish

Patience matters more than technique, and my first disaster proved it. I once laid on a thick coat of polyurethane, and it wrinkled like a prune before drying.
You can avoid that mess by applying thin coats, almost translucent, so the finish levels itself and traps no bubbles. Each thin layer builds a tougher surface than one heavy slather ever will.
Start with your first coat as a sealer, which raises the grain of the wood. Let it dry completely, checking the label for drying time, usually two to four hours. Full cure often takes up to 48 hours after that, so plan your sanding schedule accordingly.
Sand between coats with P320-grit paper to knock down the raised fuzz and smooth out any rough spots. Wipe the surface clean with a tack cloth before adding the next layer.
Repeat this process for your total coat count, typically three thin layers. More thin coats beat one sloppy one, giving you a glassy, durable finish that resists scratches and moisture.
Your forearms will thank you for the light sanding effort, and the final sheen will look like a pro job. Keep a wet edge while brushing, and avoid lap marks by working in one continuous pass.
Use a drop cloth and painter’s tape to protect nearby surfaces, and pick a low-VOC topcoat for better indoor air quality. Between coats, check the difference between drying time and cure time, because full hardness takes days even after it feels dry.
Frequently Asked Questions
How Do I Stop Bubbles From Forming in Varnish?
To stop bubbles from forming in varnish, thin the varnish with 10% water and let it rest for 20 minutes before application. This allows trapped air to escape, and for water based varnish, it reduces surface tension dramatically.
For roller application, wrap and tape your microfiber roller to create a smoother surface that lays down a more even film. Avoid back brushing and overworking the finish, since every extra pass reintroduces air into the wet coat.
Use a foam brush for tight spots instead, which naturally self levels. Always apply thin coats, about 2 to 3 total, and wait the full recoat time stated on the can, usually 2 hours, to avoid off gassing between layers. That rest period is your best bubble prevention.
Can I Apply Water-Based Varnish Over Oil-Based Stain?
Yes, you can apply water-based varnish over oil-based stain, but only after the stain has fully cured. The key issue is that water-based varnish won’t bond to oily surfaces, so rushing this step causes peeling and poor adhesion later.
Wait at least 72 hours, though a full week is safer for dense woods like oak. Then, lightly sand with 220-grit paper to knock down any raised grain and create tooth. Wipe off the dust with a tack cloth before brushing.
For best results, apply two thin coats of a water-based polyurethane, allowing four hours between coats. Use a synthetic brush to avoid bubbles. If you are working with a gel stain, check the label for “topcoat compatible,” since those can trap moisture and need longer drying times.
Why Does My Varnish Look Cloudy or Milky?
A cloudy or milky varnish finish is nearly always the result of trapped moisture, either from humidity above 75% or cold temperatures below 15°C. This haze appears because water condenses into the wet film as it cures, blocking light from passing through evenly.
Check your workspace with a simple hygrometer first, and avoid coating on damp days or in unheated garages. If the cloudiness has already set, lightly sand the surface with 320-grit sandpaper to break the skin, then apply a fresh, thin coat under drier conditions.
For best results, varnish only when the room sits between 18°C and 24°C with humidity under 60%. Also let each coat dry at least 24 hours without reintroducing moisture, and never rush drying with direct heat. A dehumidifier or a warm, ventilated space can save you from a full strip and recoat, so check the forecast before you open the can.
How Long Should I Wait Before Recoating After Sanding?
You should wait 2 to 4 hours before recoating after sanding, but always confirm the surface is no longer tacky to the touch. Your sanding grit directly affects that window, since finer grits like 220 leave a smoother profile that absorbs slower and needs less drying time. Because temperature drives solvent evaporation, a cooler room actually lets you recoat sooner, often closer to the 2 hour mark, without waiting long.
If you used a coarse 80 grit on bare wood, extend the wait to the full 4 hours before your next finish coat. A quick test with your knuckle, rather than your fingertip, avoids leaving oils behind and tells you if the previous layer has cured enough. This same timing applies whether you are brushing polyurethane or wiping on a stain sealer.
Can I Use a Sprayer Instead of a Brush or Roller?
Yes, you can use a sprayer instead of a brush or roller, and it is about 50% faster once you are set up. However, you must dial in the fluid pressure and use a steady, overlapping pass to prevent runs and sags.
Thin your material slightly, about 10 percent, and always test your pattern on cardboard before touching the wall. For a smooth finish, spray a single tack coat, then a full wet coat; back-rolling with a 3/8 inch nap helps bond the paint to drywall. Keep the gun at 12 inches and move in straight lines, not arcs. This method also works well for spraying stain on cabinets, where tip size matters more than speed. Clean the gun immediately after use to avoid clogged nozzles.
Rounding Up
To apply water-based varnishes, you spread thin coats instead of thick, ambitious ones. Treat it like buttering toast, where you spread, not slap, the finish onto the surface.
Sand lightly between each pass to build that glassy, smooth result. Check your sanding grit before you begin, and compare your brushstroke speed on a scrap piece first.
Test one thin coat and let it dry fully before judging the outcome. Ask yourself if you are rushing, because patience is cheap, but re-sanding a botched table costs a Saturday.
Stick to the plan and your furniture will thank you. Read next about spray application techniques for larger projects.