What Are Yacht Varnishes? Types, Uses and How to Choose

Selecting the right yacht varnish is the most critical step in achieving a flawless, long-lasting finish. The options for these coatings—from traditional spar to advanced catalyzed systems—can be overwhelming.
The key to making the right choice depends entirely on your specific project needs, such as desired sheen and operational environment.
We will break down the pros and cons of each major category, including one-part polyurethanes and robust two-part solutions.
You will learn exactly how to match the right varnish to your climate, budget,and surface preparation requirements.
This guide will equip you with all the knowledge needed to make an informed decision before you apply your first coat.
Quick Answer
- Yacht varnishes protect exterior wood with flexible, UV-resistant films that endure sun and salt.
- Spar varnish offers amber glow and flexibility but scratches easily and needs longer drying.
- One-part polyurethane balances cost, durability, and easy application for most cruisers.
- Two-part catalyzed systems provide superior abrasion resistance but require fast work and full recoats.
- Choose based on use: flexible spars need spar, flat trim suits polyurethane, high-wear demands two-part.
What Are the Three Main Types of Yacht Varnish?
Yacht varnish comes in three main families, and knowing them helps you choose the right topcoat. The first is traditional spar varnish made with oil, which stays flexible, never fully hardens, and gives an amber glow.
It works well on spars that flex, but it needs more drying time between coats and a longer cure time before harsh use. Sanding with 220 grit between coats helps the next coat bite and keeps brush strokes smoother. Traditional oil-based formulas also deliver UV absorbers that protect exterior wood from sun damage over extended exposure.
Polyurethane is the next family, and it gives a tougher film with a gloss or satin sheen. It resists wear better than traditional spar varnish, but it can crack on flexible spars because the film is harder.
For flat trim and interior wood, a polyurethane topcoat can look great if you keep a wet edge and avoid heavy brush strokes. Set up a drop cloth and use painter’s tape on hardware, check the VOC level, and follow the label for drying time and cure time.
Two part catalyzed systems are the third family, and they mix resin with a hardener before use. They offer serious durability and a hard film, but you must mix small batches and work fast because the pot life is short.
Cost varies by family: a one part varnish runs about $30 to $60 a quart, while a two part catalyzed system jumps to $80 to $120. I have seen cheap cans fail fast, so buy from a supplier that stores varnish properly and check the date on the can.
Match the varnish to how much your wood moves and how much time you can give each coat. For most DIYers, a one part polyurethane gives a good balance of cost, durability, and easy application.
Yacht Varnish Types: Durability and Finish Compared
Durability and finish both matter, but they do not always point to the same varnish. Two part varnishes last longer, while one part polyurethanes often give a higher gloss.
Traditional spar varnish has moderate durability and a warm amber, low gloss finish. It flexes with wood, but it scratches easily and loses gloss fast.
Traditional spar varnish flexes with wood but scratches easily, losing gloss faster than expected.
I have seen spar varnish dull sooner than I expected on a boat show sample. It still suits wood that needs to move, such as a thin spar.
One part polyurethane has good durability and a clear, high gloss finish. It gives a hard shine, but it can crack on spars that flex.
You can touch up one part polyurethane easily with a brush, which helps on a cruiser. A small repair can blend in without a full strip and recoat.
Two part catalyzed varnish has excellent durability and a hard, medium to high gloss finish. It resists abrasion best, but repairs are hard because you have to sand and recoat every time.
Two part systems also need careful mixing and a good respirator because the VOC level is higher. Follow the mixing ratio and the recoat window on the label.
For most cruisers, I would pick one part polyurethane. It gives good durability and a high gloss finish, and small repairs do not take the whole weekend.
Prepare wood by sanding with 120 grit, then wipe off the dust before you apply the first coat. Keep a wet edge while brushing to reduce lap marks and visible brush strokes.
Use painter’s tape and a drop cloth to protect nearby surfaces. Work in shade when you can, and remember that drying time and cure time are different.
A primer belongs under paint, not under clear varnish. A stain can warm the wood, but test it first.
A clear topcoat will show every sanding scratch, so finish with finer grit before you build the film. Check the sheen you want: gloss, satin, or matte.
Let each coat dry fully, then sand lightly before the next coat. Wipe off dust before the next coat.
Oil-based varnishes typically offer greater longevity and hardness, though they require longer drying times and higher VOC levels compared to water-based alternatives.
Choose the Right Yacht Varnish for Your Climate
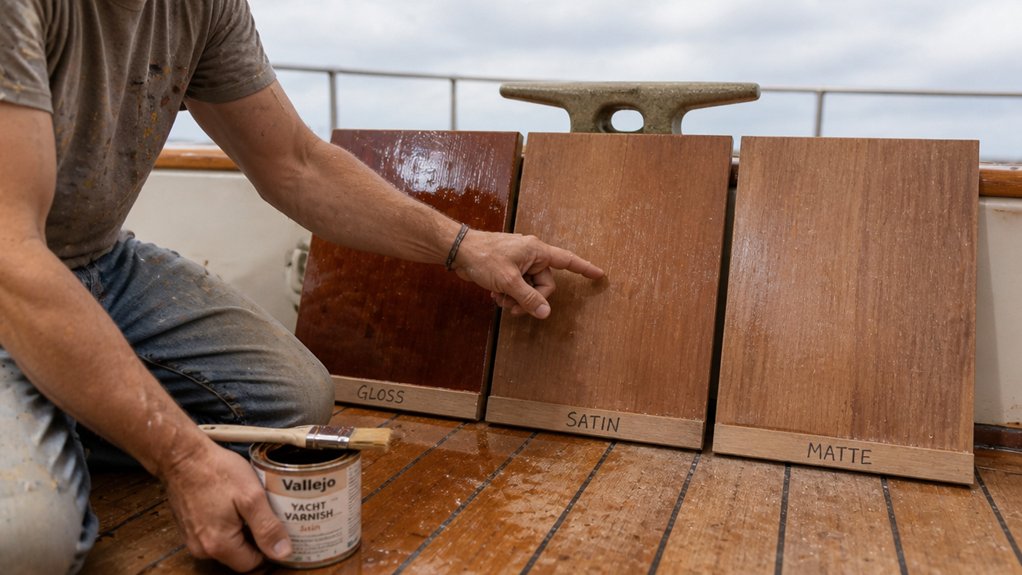
Your latitude tells you how much sun your finish will take. The brand name on the can tells you little, because UV intensity drives how fast the finish breaks down.
In Miami the sun is strong and the wood bakes. In Seattle you get more damp and weaker sun, so the finish ages on a different schedule.
For strong sun, use a polyurethane topcoat that comes in two parts. It resists abrasion and holds up under UV longer than a basic spar varnish. Check for UV inhibitors like benzotriazole and HALS to ensure serious protection.
In northern climates, a traditional spar varnish stays flexible and moves with wood through freeze and thaw cycles. Check the can for UV blockers and pick the sheen you can maintain, whether that is high gloss, satin, or matte.
In Florida, plan on two fresh coats each year. Up north, one coat often gets you through the season.
Use the sanding grit listed on the label, then wipe off the dust before the topcoat. Keep a wet edge while brushing to prevent lap marks and visible brush strokes.
Use painter’s tape and a drop cloth to protect nearby surfaces. Follow the label for drying time and cure time, especially before you sand between coats.
A wood stain needs to dry fully before you cover it with varnish. Primer goes on bare wood when the label calls for it, and low VOC products still need good airflow while they dry.
Application, Maintenance, and Compatibility Rules
Before you open a can, set out a drop cloth and tape the edges with painter’s tape. Pick a stain, varnish, or polyurethane that matches the existing finish, then test it on scrap wood.
Varnish that mixes two components will not stick over a varnish made with one component, so check compatibility first. Repairs and touch up are easier with varnish made from one component, while varnishes that cure with a catalyst need full sanding and reapplication.
Use 220 grit sandpaper for a light sanding between coats, and do not skip it if more than 36 hours have passed. Wipe off dust and keep a wet edge so lap marks and brush strokes do not build up. Recoat intervals vary between 1 to 3 hours for most water-based options, so plan your application schedule accordingly.
Seal teak with epoxy primer to stop finish bleeding through and to reduce blistering. Let the primer reach its drying time before you apply the topcoat, and remember that cure time is when the finish hardens fully.
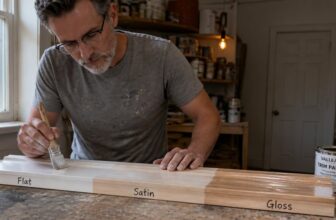
Mix varnish or polyurethane that uses two parts in small batches because it starts to set in a few hours. Check the sheen on scrap first: gloss, satin, and matte reflect light in different ways, and a product with low VOC may need more drying time.
Keep the work area clean and check the label for VOC limits and safety instructions. Test your finish on scrap, match the sheen, and note the sanding grit and drying time so the next coat goes on evenly.
Frequently Asked Questions
Can Yacht Varnish Be Applied Over Old Paint?
No, yacht varnish should not be applied over old paint unless the existing coating is sound, compatible, and properly prepared. Old paint can lift or soften under a solvent-rich marine varnish, so do not gamble on a full coat.
First clean the surface, then sand a small area with 120-grit paper and run a tape-pull adhesion test after 24 hours. If the paint flakes or the tape lifts, strip back to bare wood rather than coat over it.
That preparation is the only shortcut worth taking. A proper bonding test and sanding routine prevent peeling and save you a costly redo.
How Long Must Two-Part Varnish Cure Before Sanding?
Let two-part varnish cure for at least 24 hours before sanding, and confirm the product’s specific curing schedule. That overnight window is only a safe starting point because many two-part varnishes remain soft longer than labels suggest.
For a practical test today, sand a small hidden area with 320 grit after 24 hours; if the paper loads or the finish feels tacky, stop and wait another 12 to 24 hours, keep the shop warm, and avoid rushing the recoat or sanding step, since patience prevents gumming up your paper and gives a cleaner finish.
Does Temperature Affect Varnish Drying Time Significantly?
Temperature significantly affects varnish drying time, so yes, it is a major factor rather than a minor detail. Hot days speed solvent evaporation and shorten recoat windows, while cold days stall the film and stretch cure time; humidity adds another variable to watch.
For a practical starting point, at 70°F and 50% relative humidity, a thin oil-based varnish coat often tacks in 4 to 6 hours and sands after 24 hours, but below 60°F add roughly 50% to that schedule. Use a temperature correction chart for your finish and test a small hidden area before committing to the whole project.
Can I Use a Roller Instead of a Brush?
You can use a roller instead of a brush for marine varnish, but I would not recommend it. A roller leaves nap texture, bubbles, and stippling rather than the smooth, glassy film a brush can lay down.
For a reliable marine finish, use a high-quality natural-bristle brush and apply three thin coats. Sand lightly between coats with 220-grit paper after the varnish is fully hard, usually the next day in mild conditions.
Keep the coat thin and avoid overworking it. That approach gives you better control and a cleaner result than a roller, especially on trim and rails.
How Do I Remove Varnish Completely for Refinishing?
To remove varnish completely for refinishing, use a chemical stripper or heat gun, then scrape and sand to bare wood. Work in small sections and let the stripper sit the full label time, often 15 to 30 minutes, before lifting the softened finish with a plastic scraper.
Follow with 120 grit sandpaper to remove residue, then switch to 180 grit for a smooth surface before applying new coats. A heat gun helps on thick varnish, but keep it moving to avoid scorching the wood.
Repeat the stripping and sanding process until no shiny patches remain, then wipe with a tack cloth. For stubborn spots, use a varnish remover and test a small area first.
Rounding Up
Yacht varnishes are finishes you choose by honesty and fit, with spar urethane as the tried-and-true workhorse and polyurethane as the longer lasting option. Check your expected sun and salt exposure today before you pick a varnish.
Write down your temperature limits before you apply anything. Compare one-part and two-part costs and lifespan before you buy.
Two-part polyurethanes cost around $120 a gallon, a figure that measured the cost to buy them. Ask whether stripping brightwork is worth the misery before you commit to it.
Next topic: Brightwork stripping.