What Are Paint Trays? Types, Uses and How to Choose
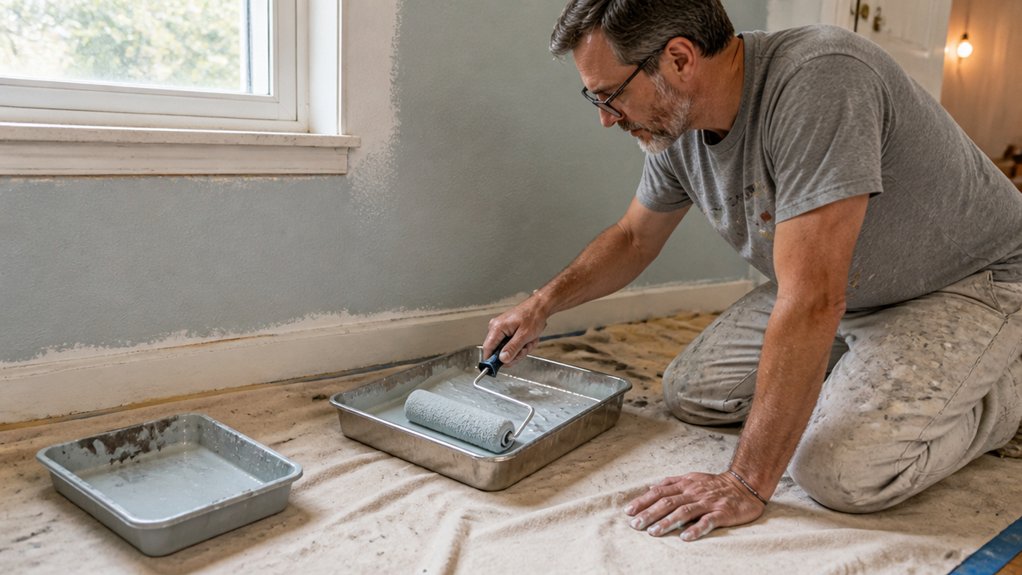
A paint tray should not slide, crack, or overload your roller mid coat. This guide answers what paint trays are, plus the types, uses, and how to choose one without messy refills.
You do not need a fancy setup, but plastic and metal trays handle solvents differently. Match tray size to your roller, from mini trim rollers to jumbo floor rollers.
We will cover deep wells, liners, cleanup, and drying time between coats so you can pick a tray that fits your project.
Quick Answer
- Standard 9-inch trays suit most walls; mini trays for trim, jumbo for large floors.
- Plastic trays work with latex paint; metal trays required for oil-based products and solvents.
- Deep well trays reduce refills and maintain wet edges; shallow pans cause frequent breaks.
- Liners speed color changes in seconds, saving cleanup time versus washing trays.
- Match tray ramp ridges to roller nap for even paint loading and controlled application.
Plastic vs. Metal Trays: Which Handles Your Paint?
A plastic tray fits water based latex wall paint for most home projects. It is light, cheap, and easy to rinse with soapy water after you lay a drop cloth and mask the trim with painter’s tape.
A plastic tray suits latex wall paint: light, cheap, and easy to rinse with soapy water.
Use a metal tray for oil based paint, stain, varnish, or polyurethane that needs mineral spirits. Solvents will soften plastic fast, while metal shrugs off the cleanup and lasts for years. Heavy-duty metal trays resist deforming and rust properly when coated, making them a durable choice for solvent-based work.
Set up your work area before you open the can, and check the label for VOC level and the sheen you want on the topcoat. Gloss, satin, and matte sheens show brush strokes and surface flaws in different ways, so test a small board after the primer dries.
Sand with the sanding grit the label recommends, and keep a wet edge to avoid lap marks on large sections. Respect the drying time before you apply the next coat, and let the finish reach full cure time before heavy use.
Clean plastic with soapy water while the paint is still wet, then rinse the tray and let it dry. Clean metal by scraping the tray and wiping it with mineral spirits, then store it where it can drain.
Match the tray to the product in the can: plastic for latex, metal for solvent based finishes. That simple choice saves you from a wavy tray and a messy cleanup.
What Paint Tray Size Do You Actually Need?
For nearly all wall and ceiling work, pick a standard nine inch paint tray. It matches a nine inch roller frame and holds enough paint to cover a useful section without sloshing.
A larger tray invites spills on your drop cloth and adds weight you do not need. The standard tray gives you better control when you load the roller and keep a wet edge, which helps prevent lap marks on the topcoat.
Skip the standard tray only for very small pieces like dollhouse furniture or very large open spaces like a gymnasium. For those jobs, match tray size to the roller and the amount of paint you can apply before the sheen or gloss starts to set.
Keep painter’s tape on hand for edges, and use the same tray for primer and topcoat. Check the label for VOC level, drying time, and the sanding grit to use between coats. Matching the roller nap to your surface texture—from 3/8-inch for smooth walls to 3/4-inch for rough stucco—ensures even coverage and prevents streaking.
Standard Nine-Inch Trays
The standard nine inch tray is the only paint tray most jobs need. It fits a nine inch roller, so the roller cover nap picks up an even load and releases it across the wall.
The slope angle is steep enough to load the roller cover evenly, and shallow enough to keep paint from pooling in the tray. You get smooth coverage with less mess.
A solid plastic tray costs about five dollars and handles primer and topcoat on most walls and ceilings. Use a liner when you switch from primer to topcoat so you can keep moving and avoid cleaning the tray.
Pick the sheen you want before you load the tray: matte, satin, or gloss. Work with a wet edge to avoid lap marks and heavy brush strokes.
Check the label for VOC level and drying time before you start. Cure time can run longer, so let the finish harden before you judge the sheen.
Lay a drop cloth and set painter’s tape before you open the tray. If the surface needs prep, sand with the right sanding grit before primer.
For wood finishing, keep a separate tray for stain, varnish, or polyurethane. Keep another tray for paint so clear finishes stay free of paint flecks. Choose a canvas drop cloth that is machine washable and double-stitched to handle paint splatters and heavy foot traffic during the job.
Capacity vs. Project Scale
Choose a paint tray that fits the job size. I learned this by carrying a jumbo tray up a ladder for one doorframe.
A quart or mini tray works for trim and cabinets where you brush primer and roll small topcoat areas. A standard 9 inch tray holds about a pint and suits a single room.
For a whole house, a deep well gallon tray or jumbo tray reduces refills, but it gets heavy fast on a ladder. Tray depth affects roller pickup and your patience.
A shallow tray means more dips, while a deep tray holds more paint and adds weight. For a 10×12 wall, a standard tray handles about 100 square feet before you refill, which gives you a surface area coverage estimate.
Lay a drop cloth and tape off trim with painter’s tape before you start. Keep a wet edge on primer and topcoat so you avoid lap marks and brush strokes.
Sheen matters too: gloss and satin show marks more than matte, so check your work as you go. For stain, varnish, or polyurethane, use a small tray or cut bucket for control.
Follow the drying time before recoating and the cure time before heavy use. Low VOC finishes still need airflow, and sand with the grit your finish calls for between coats. Standard ACME threads on your tray’s roller frame ensure a universal fit with extension poles, letting you reach high walls without repositioning a ladder.
5 Tray Types: Walls, Trim, Ladders, or Big Jobs

Pick a standard tray for most wall and ceiling work. A tray sized for 9 inch rollers fits common roller covers and keeps your arm from tiring during a normal room.
Use a deep well tray or a jumbo tray for a large room or a whole floor. A shallow pan needs refilling every few minutes, which wastes time and breaks your wet edge. For extensive jobs, a 5-wire cage spreads paint smoother and resists rust with galvanized steel.
For trim and ladder work, choose a mini tray or a quart pail. Hauling a full gallon up a step stool risks drips on the drop cloth and extra cleanup.
Match the tray to the job and to your paint. Use the same setup for primer and topcoat, and check the label for drying time and cure time before you recoat.
Standard 9-Inch Trays
In any paint aisle, you will see a 9 inch tray sitting there like the dependable workhorse of DIY painting. I use it for walls and ceilings because it hits the sweet spot: not too big, not too small.
The grip on the sides lets me carry it with one hand even when it is sloshing with paint. That helps when I am walking across a drop cloth and trying to keep a wet edge.
Before I roll primer or topcoat, I sand wood trim with 120 grit and wipe off the dust. I also run painter’s tape along the trim and watch my brush strokes so the lines stay clean.
I keep a separate tray for stain, varnish, or polyurethane so the paint tray stays clean. That habit keeps finish products from mixing and saves cleanup time.
To store the paint tray, I rinse it, let it dry, and stack it with the others. It needs no special rack, and the drying time is short even when the paint cure time runs longer. For high ceilings, pairing this tray with a roller that includes a splash guard prevents drips and cuts down on frequent ladder trips.
You will find these trays for about $3 to $8 in plastic or metal. Pair one with a 9 inch roller frame and a low VOC topcoat for a simple room refresh.
The shallow well means I refill often, which is true. For a single room with a satin or matte topcoat, that tradeoff is fine by me.
Grab one for basic wall work. Skip it for sprawling projects that need long passes and a steady wet edge to avoid lap marks.
Deep-Well & Jumbo Choices
Last spring I painted a 1,200 square foot basement with a standard 9 inch tray and refilled it every ten minutes. I switched to deep well and jumbo trays, and I should have done it sooner.
A deep well tray holds about 1 gallon, so you spend less time dipping and more time keeping a wet edge on walls and ceilings. That steady supply helps you avoid lap marks when you roll primer or topcoat.
A jumbo tray holds 2 to 3 gallons and suits floors, big ceilings, and other long pulls where fewer refills matter. It gets heavy, though, so plan your path and keep the drop cloth clear before you start.
Metal deep well trays resist warping and stand up to repeated scraping and cleaning. Plastic jumbo trays are lighter, while metal jumbo trays last longer if you finish a lot of jobs. Seal quality depends on tight-fitting lids to prevent paint from drying between sessions, similar to the click-fit mechanisms on triple-lock buckets.
For trim, ladder work, or small touch ups, use a quart tray and load your brush carefully so you do not drip on the painter’s tape. Keep a separate tray for stain, varnish, or polyurethane so those finishes do not pick up paint residue.
Choose a metal deep well tray for most rooms and a jumbo tray for large open areas. Match the tray to the job, and you will roll with fewer stops and more control over the sheen.
Anti-Spill Edges, Grips, and Grids: Stop the Mess
A paint tray should catch drips, and most do not. When you pour primer or topcoat, set the tray on a drop cloth and tape the edge of the tray with painter’s tape if you work on a finished floor.
Raised lips on every side catch brush flicks and roller runoff before they reach the floor. The lip should sit high enough to hold a small puddle of paint, so a wet brush does not send drips over the edge.
A good handle and a textured grip let you carry a full tray with one hand. Check that the grip feels solid when the tray is loaded, because a loose handle will wobble and spill.
A deep grid with angled ridges pulls excess paint from the roller. That keeps the roller loaded evenly and helps you keep a wet edge when you work across a wall. For heavier jobs, four-sided metal grids lock into standard five-gallon buckets and resist rust while scraping excess paint from every angle.
For stain, varnish, or polyurethane, use a tray that fits the job and line it with a liner if you want easy cleanup. Keep the work area covered and check the label for VOC level and drying time versus cure time before you start.
A gloss or satin sheen shows brush strokes and lap marks, so use a tray that helps you load the brush evenly. On bare wood, sand with the right grit before you apply the first coat, then wipe off the dust.
A matte finish hides small flaws better than a gloss finish, and the right tray helps you keep the finish smooth. Buy a tray with raised lips, a solid grip, and a deep grid, then keep the mess on the canvas and off the carpet.
How to Load a Roller Without Drips or Patchy Coats?
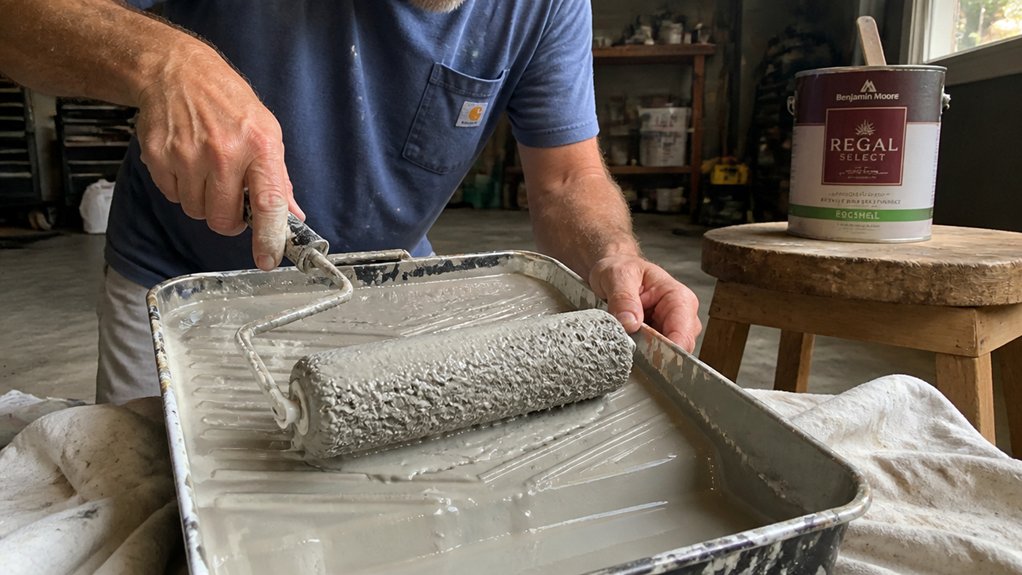
Load a roller by dipping only the bottom third of the cover, then roll it up and down the ribbed ramp five times. This gives you even paint in the cover and keeps drips off your drop cloth and shoes.
Press lightly on the upstroke to control paint flow. A loaded roller should feel heavy and ready to paint without weeping at the edges.
If paint squeezes out when you press the cover, you have too much paint. Scrape the cover on the ramp again before you roll the wall.
Keep the deep well for storage and dip only on the ramp. That way you avoid a flooded cover and patchy walls with lap marks.
Start rolling about one foot from the corner and work back into the wet edge. Keep the roller moving in the same direction so the topcoat lays down evenly.
Start rolling a foot from the corner, then work into the wet edge, keeping direction consistent for an even topcoat.
Tape off trim with painter’s tape and cover floors with a drop cloth before you load the roller. Check the paint label for VOC level and drying time, and let the coat cure before you judge the sheen.
For a satin, matte, or gloss wall paint, use a primer if the surface is bare or patched. Sand glossy spots with 120 grit sandpaper so the new coat can grip.
When you cut in edges with a brush, keep brush strokes light and work into the wet edge. For wood finishes, load a brush or roller the same way with stain, varnish, or polyurethane and watch for drips.
A 3/4-inch nap with a thermal-bonded spiral seam prevents phantom stripes and lint shedding for a smoother finish.
Disposable Liners vs. Washing: Which Saves More Time?
A paint tray liner costs more per use than washing the tray. For a busy job, the time saved on cleanup usually makes the liner the better choice.
I have scrubbed enough dried latex to know that a full rinse and wash takes about fifteen minutes per color change. A liner swap takes about thirty seconds, and you can move straight to the next coat.
That time matters when you move from primer to topcoat or change sheen from satin to gloss. You can keep your drop cloth and painter’s tape in place and put your effort into the finish. Thin 0.4-mil sheets are best reserved for light drips rather than heavy spills.
On a wood job, sanding grit, stain, varnish, and polyurethane already set the pace. A liner lets you keep your brush strokes and wet edge moving without stopping to clean a tray.
You still need to handle waste with care. A liner keeps most of the paint sludge out of your sink, which makes cleanup easier after a long day.
When a Bucket and Grid Beats a Tray
A five gallon bucket with a roller grid saves time once you cover more than one room. Hallway ceilings, garage walls, and a whole house repaint are good examples.
You stop refilling so often, and that is the main gain. I have tipped plenty of trays, but the bucket sits lower and spills less.
Before you start, lay a drop cloth and protect trim with painter’s tape. Load the grid with a 14 inch roller to coat fast and even.
Use a primer first, then your topcoat. Keep a wet edge and work in sections to avoid lap marks and heavy brush strokes.
Check the label for a low VOC product and pick the sheen for the surface. Satin or matte works well on walls, and gloss is easier to clean on trim.
The bucket is heavier, but fewer trips beat a light load. For wood trim or doors, choose the sanding grit the label recommends before you apply stain, varnish, or polyurethane.
Check drying time and cure time on the label before you handle the surface. Let each coat dry fully before you move on.
Grab a bucket and grid for any job past one room. Your floors and your patience will thank you.
Match the Tray to Your Paint and Project
Read the label on your paint or finish before you choose a tray. Thick latex and primer need a deep well so the paint has room to sit.
Thin stain can use a shallow tray, and pour only what you can use before the finish skins over. Set the tray on a drop cloth and tape off trim with painter’s tape before you open the can.
Match the tray ramp to the roller nap: a fluffy one half inch nap needs a wide ridged ramp, while a smooth quarter inch nap can use a flimsier grid. If you use a liner, press it flat so it does not lift and create a messy edge.
For wall jobs, use a standard nine inch plastic tray with a liner so cleanup takes seconds. A mini tray fits a four inch roller and sits safely on a ladder for trim, cabinets, and doors.
Oil paint can warp a plastic tray, so use a metal tray even though it costs more. For varnish or polyurethane, use a metal tray and follow the label for drying time and cure time.
Choose a sheen such as gloss, satin, or matte after you confirm the topcoat works for the surface. Use the sanding grit listed on the label between coats, then wipe off dust before you pour more finish.
Keep the room ventilated when the label calls for it, especially with a high VOC product. Work from the tray into a wet edge to reduce lap marks and brush strokes.
Frequently Asked Questions
Can I Use a Plastic Tray With Oil-Based Paint?
You should not use a plastic tray with oil-based paint. Its solvent resistance is poor, so mineral spirits and similar thinners can soften, warp, or degrade the tray.
For reliable durability, use a metal tray that stands up to mineral spirits and tough solvents. If you are mixing a small batch, line a metal tray with aluminum foil and replace the foil after each use.
As a practical check, put a test drop of your oil-based paint on the tray for 10 minutes, then wipe it with a rag; if the plastic feels tacky or soft, do not use it.
How Do I Stop a Paint Tray From Sliding?
To stop a paint tray from sliding, use an anti slip pad or a similar non-slip mat under the tray. Cut the pad slightly smaller than the tray footprint and wipe both surfaces clean first, because dust or dried paint will reduce grip.
For a quick DIY fix today, wrap two heavy rubber bands around the tray lengthwise and set it on a damp cloth, but wring the cloth so it is not dripping. Check the tray before each coat and replace the pad once it loses tack.
This setup keeps the tray steady while you roll or brush, and it works well with most paint tray liners and roller trays.
Are Paint Tray Liners Worth the Extra Cost?
Yes, paint tray liners are worth the extra cost for fast cleanup and frequent color changes, but reusable trays win long-term. For a weekend trim project, line the tray with a disposable liner and let it dry about 20 minutes before swapping colors so you avoid smearing.
Choose washable liners or clean a rigid tray thoroughly with warm soapy water to cut waste. If you spray or brush oil-based finishes, keep a dedicated tray for each product and label it. A quick search for paint tray alternatives will show silicone inserts and disposable options. Buy liners only when speed matters, and otherwise invest in a durable tray you can reuse for years.
What Is the Best Way to Clean a Metal Paint Tray?
The best way to clean a metal paint tray is to scrape dried paint, apply a solvent soak, scrub with a metal scourer, rinse, and dry completely. For a same day job, pour a thin layer of mineral spirits over the dried paint and let it sit for 10 minutes before scrubbing.
Work the edges and corners with the scourer, then rinse with warm water and a drop of dish soap. Dry the tray on a rack for at least 15 minutes so no moisture dulls the next finish.
Store it dry and clean, and keep a paint tray liner handy for quick changes.
Can I Leave Paint in a Tray Overnight?
You can leave paint in a tray overnight if you seal it tightly with a tray cover or plastic wrap to control dampness. For a water based latex, press plastic wrap directly onto the paint surface and smooth the edges; this slows skinning and buys you roughly 8 to 12 hours before the film starts to set.
If you need more time, add a few drops of water to latex or a compatible thinner to oil based paint and stir gently before covering. For supplies, search for a tight fitting paint tray cover rather than relying on a loose towel.
Rounding Up
Paint tray types and uses tell you how to choose: match the tray to the job, with a tiny pan for small trim and full size for walls. Check whether a cheap plastic tray flexes like a wet noodle, then compare it with a metal tray that has a deep well and a solid grid.
For big rooms, write down a five gallon bucket and screen instead of trays. Test the match on your next job: tiny pan for trim, full size for walls. Buy once to stop swearing at drips.
Your roller and floor will thank you. Read next about roller covers.