How to Apply Concrete Sealers: Step-by-Step Guide
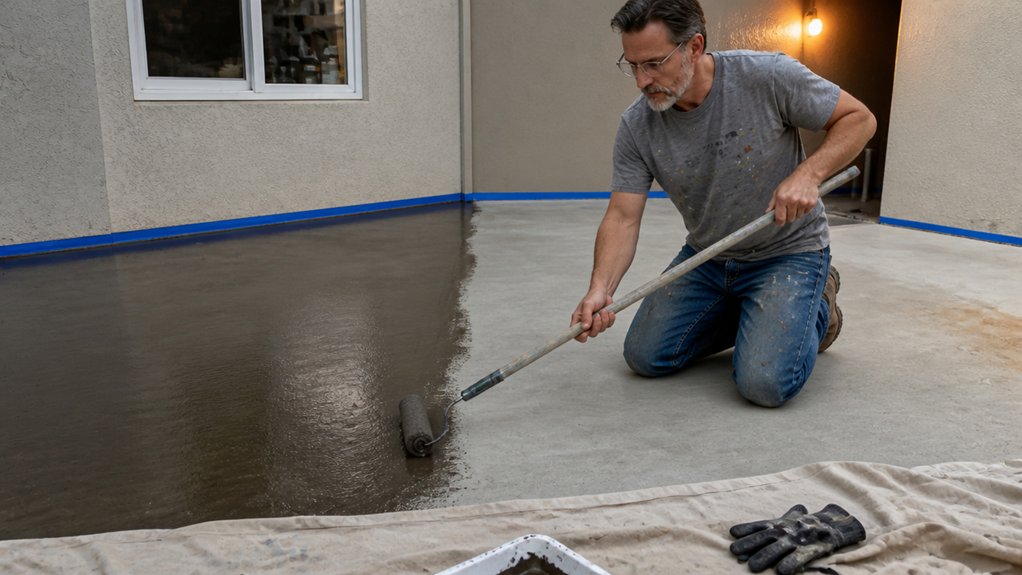
Sealing concrete feels risky if you aren’t sure about prep or timing. You can nail it by focusing on surface prep, two thin coats, and proper cure time before foot traffic. The sealer won’t bond if the pH isn’t between 7 and 10, so test the slab first to avoid peeling later.
Sand rough spots with 120 grit, wipe off the dust, and keep the area ventilated. Then spray and back-roll each coat immediately to prevent blotchy sheen, and recoat within 2 to 4 hours for a strong layer.
This guide walks you through testing, drying time, and how to fix whitening if trapped dampness appears.
Quick Answer
- Test slab pH (7–10 range) and moisture before applying sealer to ensure bonding.
- Clean, dry, and sand rough spots with 120 grit; wipe dust for proper adhesion.
- Spray thin, even coats in steady lanes, then back-roll to prevent blotches and lap marks.
- Apply two thin coats, waiting 2–4 hours between; missed windows require sanding.
- Allow 24 hours before heavy loads; fix whitening by buffing or stripping and resealing.
Do These 5 Cleanups Before You Seal: Or Watch It Peel
Before you open that sealer bucket, accept that your concrete needs work. I have watched a perfect finish bubble up like a bad science experiment because I skipped the prep.
Grab a concrete pH testing kit first. New slabs are usually too alkaline, and sealer will not bond to that surface. You are aiming for a pH between 7 and 10. Anything higher means you are just painting over trouble. Zero-VOC formulations are safer for enclosed spaces, but they still require the same surface neutrality to bond properly.
Next, check for moisture coming through the slab. A plastic sheet test gives you a rough idea, but a moisture vapor testing kit gives you real numbers. If water vapor is pushing up, your sealer will blister and peel every time.
Think of this like icing a cake that is still steaming. You need the surface dry and neutral before you lay down a coating. Use a drop cloth to keep the area clean and painter’s tape to protect edges.
>Sealing concrete is like frosting a hot cake—wait until it’s dry and neutral, or you’ll ruin the whole batch.
Check the sealer’s drying time versus cure time on the label. A fast-drying topcoat can hide problems if you rush the base. Sand any rough spots with 120 grit sandpaper before sealing, and wipe away all dust.
Apply the sealer with a wet edge to avoid lap marks and brush strokes. Work in sections and keep a consistent sheen, whether you choose satin or gloss. Low VOC products still need proper ventilation.
Do this cleanup now, or redo everything later. A little patience with pH, moisture, and dust saves you a weekend of stripping failed sealer.
Spray vs. Roll: How to Apply Concrete Sealer in Thin Coats at the Right Time
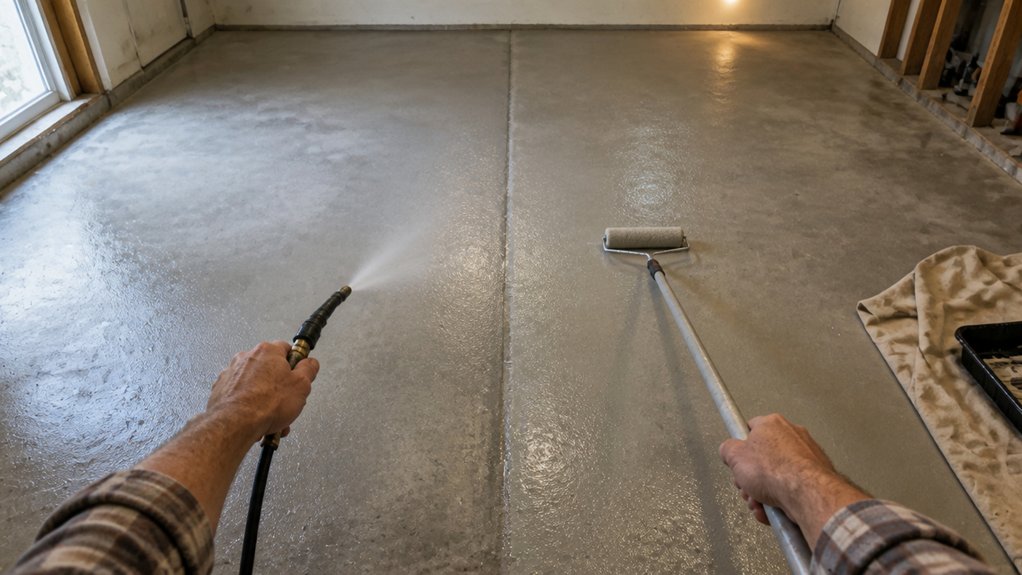
A sprayer with a fine fan pattern lays down an even coat much faster than a roller can. You still need to back-roll right away to spread the sealer and prevent dark blotches where passes overlap.
Rolling alone works, but it is slow and easy to mess up. If your roller gets too saturated, the sealer drips and leaves lap marks that are hard to fix.
Keep a wet edge while you spray, moving in steady lanes with light overlap. A clogged nozzle causes streaks, so check the screen and tip before you start.
Two thin coats beat one thick layer every time. Thin coats dry faster, avoid puddling, and give you a more uniform sheen on the finished slab.
Thin to win, and watch your drying time between coats, not just the cure time. If you recoat too soon, you trap solvent; if you wait too long, the next coat won’t bond.
Spray for speed and back-roll for control. Do both, and you get a smooth, even finish without brush strokes or roller texture. Always confirm your chosen formula is low-VOC and breathable to ensure proper moisture release and compliance with indoor air quality standards.
After Sealing: How Long to Dry, When to Recoat, and How to Fix Whitening?
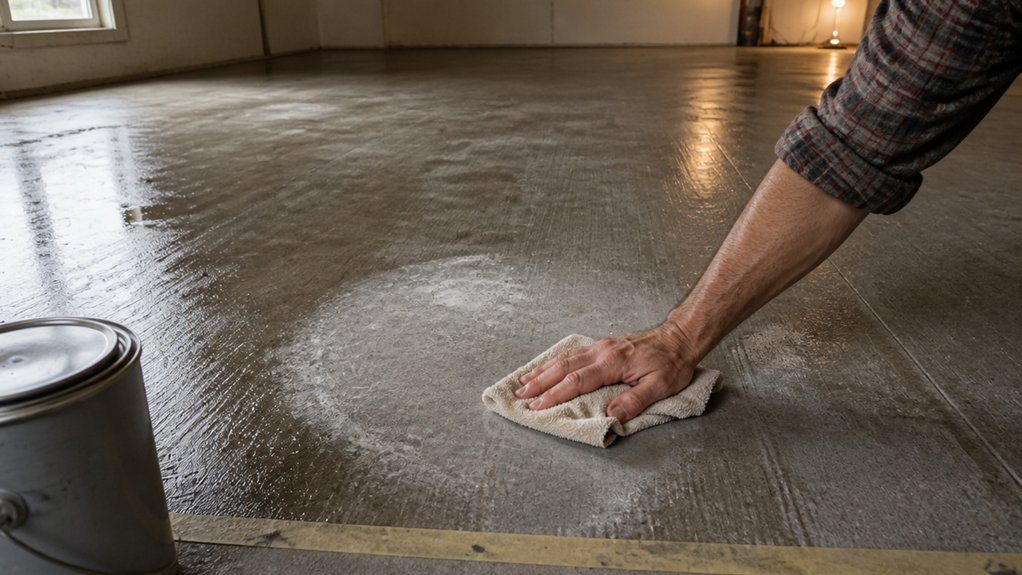
You’ve sealed the surface and now you’re watching the clock, wondering when it’s safe to walk on it without leaving a sneaker print. Drying time is your first hurdle, and it depends on temperature and humidity.
At 70°F, the sealer feels tack-free in 1 to 2 hours, and light foot traffic is fine after 3 to 4 hours. For heavy items like cars or furniture, wait a full 24 hours before setting anything down.
Recoating has a strict window, so check the label on your can. Most sealers accept a second coat between 2 and 4 hours after the first, while the surface is still receptive.
Recoating has a strict window, so check the label—miss it, and you’ll be sanding.
If you miss that window, the new coat won’t bond, and you’ll have to sand it down with 120 grit before trying again. This is a common mistake, and it turns a quick job into an afternoon of extra work.
Whitening, or a milky haze, happens when moisture gets trapped under the sealer or when you lay the coat on too thick. The fix is to remove the bad layer completely, either by grinding with a floor buffer or using a chemical stripper.
Once the surface is clean and dry, reseal with thin, even passes. A wet edge helps avoid lap marks, and a foam brush or roller keeps the finish smooth.
Use a drop cloth and painter’s tape to protect adjacent areas, and check the VOC level on your sealer if you’re working indoors. Ventilation matters, especially with solvent-based polyurethane or varnish.
Patience beats regret here. Thin coats, proper timing, and clean tools will save your driveway and your weekend.
For maximum longevity, remember that deeper penetration beats surface coating against dampness and freeze-thaw damage, so choose a silane/siloxane formula that bonds chemically without altering the brick’s appearance.
Frequently Asked Questions
Can I Seal Concrete That Was Just Pressure Washed?
Yes, you can seal concrete that was just pressure washed, but only after it has fully dried, which typically takes 24 to 48 hours. Sealing too soon traps moisture inside the pores and can cause a cloudy, peeling finish that won’t last.
I always perform a dampness test before any sealer application: tape a square of plastic sheeting to the surface and check for condensation after 24 hours. If the underside is dry, you’re clear to proceed; if not, wait another day and retest.
For best results, let the concrete dry in warm, breezy weather, and consider using a moisture meter for a more precise reading. A quick rule of thumb is to wait until the surface looks lighter and feels dry to the touch, even if the 48 hour mark hasn’t passed. This extra patience protects your work and prevents costly stripping and resealing later.
What Happens if I Seal Over Old Sealer?
Sealing over old sealer risks adhesion failure, which can cause the new topcoat to peel prematurely from the existing film. Before you do anything, test the old sealer by pressing a piece of duct tape onto it and ripping it off quickly.
If you see any sealer stuck to the tape, the bond is weak and you must strip it completely. If the tape stays clean, scuff the surface with 220 grit sandpaper and apply a fresh bonding primer as a bridge coat.
For a solid recoat, always follow the manufacturer’s instructions for dry times, not your gut. For example, water based sealers often need 2 hours before a second coat, while solvent based systems may require overnight.
Also, verify compatibility between the old sealer’s solvent and your new product. If unsure, apply a small test patch in an inconspicuous corner first, then check the cure after 48 hours. This saves you from a costly full strip down the road.
How Long Should New Concrete Cure Before Sealing?
New concrete should cure for at least 28 days before applying any sealer, as this full timeline allows moisture levels to drop low enough for a proper bond. Rushing the job with a premature coat can trap dampness, leading to blushing or peeling later.
A simple field test is to tape a 12 by 12 inch plastic sheet to the slab for 24 hours. If condensation appears underneath, the concrete is still too wet, so give it another week and retest.
For most residential floors, a penetrating sealer works best after this period. Match your product to the finish, and apply thin, even coats using a roller with an extension pole for consistent coverage.
Can I Walk on Sealer With Shoes After 24 Hours?
Yes, you can walk on sealer with shoes after 24 hours, but only for light, necessary trips across the surface. The coating is dry to the touch, yet it remains tacky underneath, so shoes can leave scuff marks or pick up debris. I recommend waiting a full 72 hours before normal foot traffic, and 7 days before moving furniture or rugs over it. To test safely, press your thumb into an inconspicuous corner; if it feels sticky, keep shoes off. For extra protection, wear soft-soled slippers or clean socks instead of rubber-soled sneakers, which tend to grab the finish. If you must walk on it early, lay down cardboard or drop cloths as a walkway. Related term: “cure time,” which refers to full hardness, not just dry-to-touch. A second thin coat, applied after 24 hours, will also extend the tacky period, so plan your foot traffic accordingly.
Will One Thick Coat Ever Work as Well as Two Thin Coats?
No, one thick coat will never work as well as two thin coats. Thick paint dries unevenly, trapping solvent beneath the surface, which causes blotchy patches and weak adhesion, especially when applied with a roller instead of a sprayer.
For example, on bare wood, a single heavy layer of latex can take over 24 hours to dry, while two thin coats each dry in about 2 hours. Sand lightly with 220 grit between coats to knock down any raised grain, ensuring a smooth, uniform finish.
The “thin to win” rule always beats one-coat coverage, because it builds a stronger film with better flow and leveling. Search for “dry film thickness” to understand why multiple passes offer superior protection and hide, saving you from costly rework.
Rounding Up
To apply concrete sealers, you must prep the slab, because roughly 80% of sealer failures trace back to a dirty slab. Before you pour a drop, test the surface with water to see if it beads or soaks in, then clean it completely.
Spray the sealer on for even coverage, and back roll to work it into the pores, using thin coats two to three hours apart. Write down your timing so you wait 24 hours before walking and 72 before driving on it.
If you see whitening, that is trapped dampness, so let it dry and then apply a recoat to fix it. Check the weather forecast before starting, because moisture in the air will ruin the cure.
Compare your dry time with the product label, and ask your supplier about the ideal temperature range. Read next about concrete stain application.